Sunday, 31 August 2014
Merryn's Menu: Last day of Winter Garden Share Collective
Merryn's Menu: Last day of Winter Garden Share Collective: This past week with the longer days, and plenty of rain, all crops are blooming. So too is the chickweed - shame we can't train the chi...

Last day of Winter Garden Share Collective
This past week with the longer days, and plenty of rain, all crops are blooming.
So too is the chickweed - shame we can't train the chickens to eat chickweed (what a funny name).

Here we have growing lettuce, broccoli and silverbeet in neat rows, growing taller than the weeds.

So many seedlings growing, from seed to become strong, ready to plant out into vegetable beds.


One big issue we faced is the amount of weeds
growing through the strawberry patch.
I forklifted up each strawberry plant,
removing the weeds and placed the strawberry
plants in foam boxes until their bed was totally
weeded, topped up with soil and ready to be replanted.


So too is the chickweed - shame we can't train the chickens to eat chickweed (what a funny name).
Here we have growing lettuce, broccoli and silverbeet in neat rows, growing taller than the weeds.
So many seedlings growing, from seed to become strong, ready to plant out into vegetable beds.
Snow peas and soy beans (edamame) growing with an upright support.
One big issue we faced is the amount of weeds
growing through the strawberry patch.
I forklifted up each strawberry plant,
removing the weeds and placed the strawberry
plants in foam boxes until their bed was totally
weeded, topped up with soil and ready to be replanted.
 |
| Charming silverbeet (spinach) |
The aloe vera is very happy as it is flowering, a pretty orange sight.
Produce we picked this week. two custard apples which will ripen now picked
a big bunch of bananas and the ever present luscious red tomato.
 |
| The nectarines are ripening early this year, probably because winter was so mild. |
 |
| Broccoli side shoots |
 |
| More lettuce |
I planted some pretty Heartsease in my herb garden to add colourful delight.
These are so pretty, and also, edible.
I hope you have enjoyed my garden, as much as I enjoy gardening.
Please stroll around the other
members of the Garden Share Collective hosted by Liz
and be delighted by the spring gardens you can view.
Bon appetito, Enjoy Merryn
Monday, 25 August 2014
Merryn's Menu: Super Simple Strawberry Jam
Merryn's Menu: Super Simple Strawberry Jam: Last weekend I made a last minute emergency dash to pick up our apprentice from Newcastle. I knew it Publish Postwas possible that I would have to coll...
Super Simple Strawberry Jam
Last weekend I made a last minute emergency dash to pick up our apprentice from Newcastle.
I knew it was possible that I would have to collect him, despite having arrangements in place.
So in lieu of being invited to (a) a friend's tupperware party and (b) champagne later with my neighbour, I collected my Mother for company and headed off to Newcastle.
It would have been nice to have had more notice so we could have spent the day shopping in Newcastle; but nevertheless at 3pm on arrival in Newcastle it was not worth the rush to spend one hour speed shopping at Charlestown or Greenhills.

Leaving Newcastle, with Sam in tow we noticed a wonderful road side stall near Morpeth sporting big, fresh, lovely strawberries. We did some other fresh vegetable and fruit shopping too so we felt like the trip was worthwhile after all (no offence to Sam).


I knew it was possible that I would have to collect him, despite having arrangements in place.
So in lieu of being invited to (a) a friend's tupperware party and (b) champagne later with my neighbour, I collected my Mother for company and headed off to Newcastle.
It would have been nice to have had more notice so we could have spent the day shopping in Newcastle; but nevertheless at 3pm on arrival in Newcastle it was not worth the rush to spend one hour speed shopping at Charlestown or Greenhills.
Strawberries have just come into season and they have been beautiful.
It was definitely time to make Strawberry Jam.
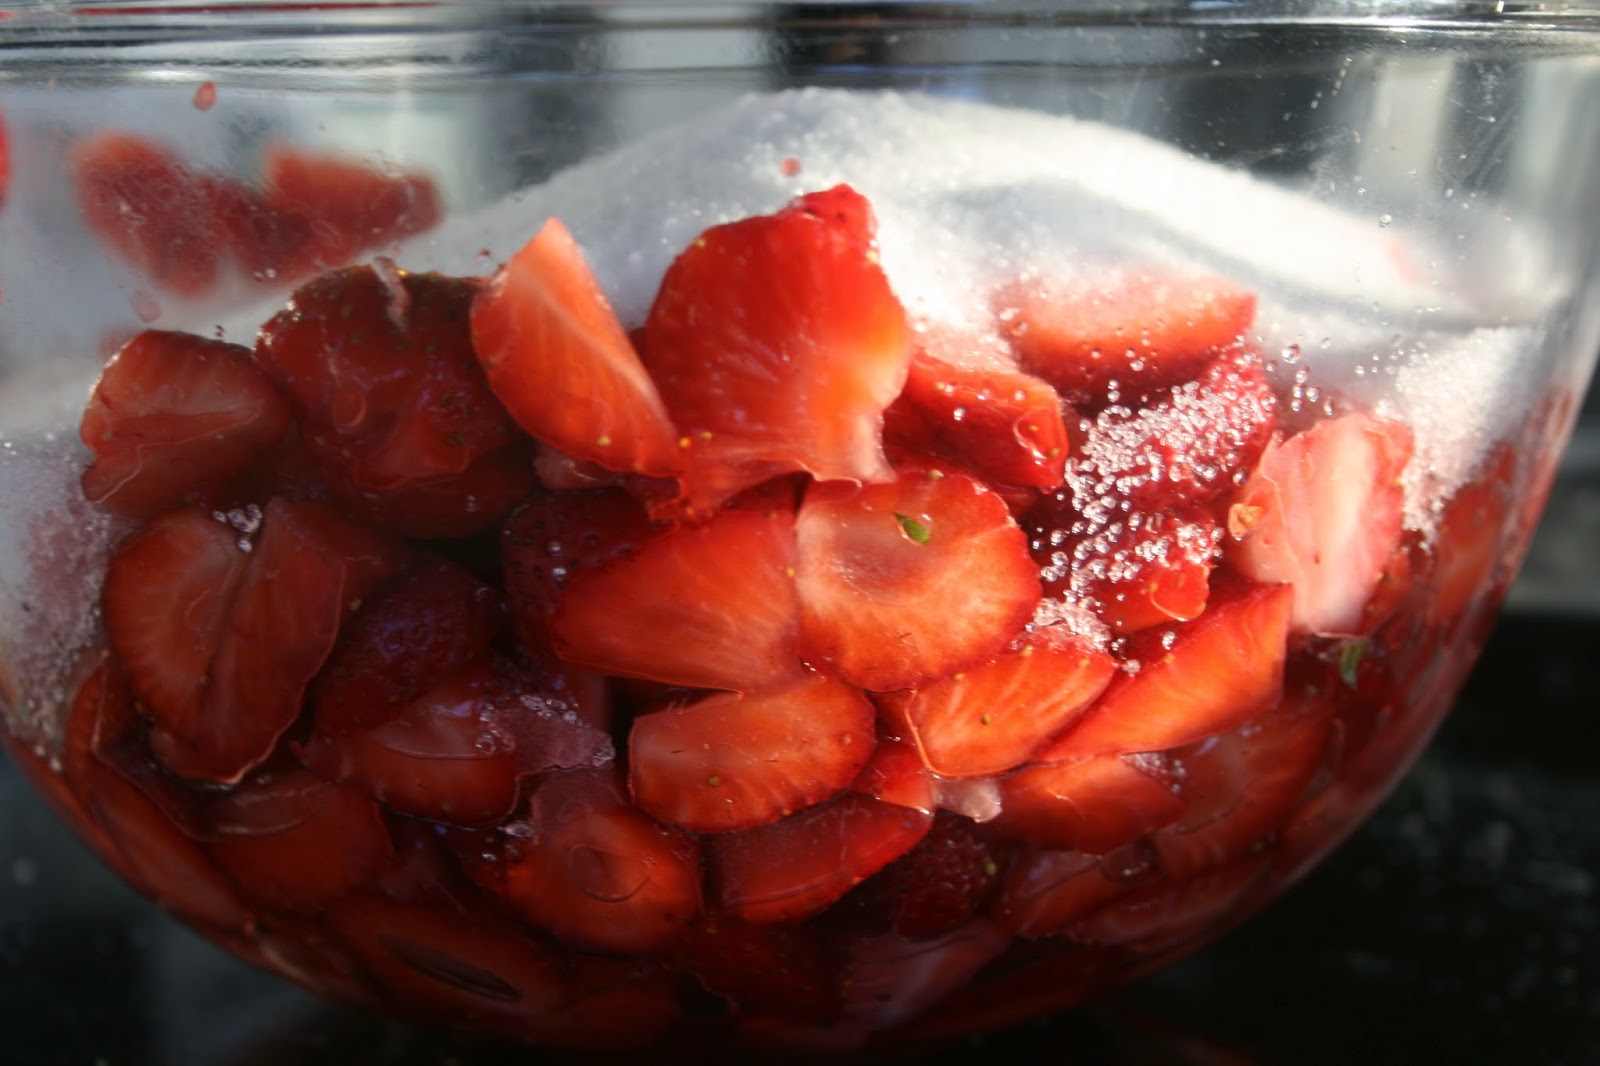
Firstly I weighed 1.3 kilos of strawberries, rinsed, hulled and roughly sliced them into a big bowl.
I weighed them again to find it had reduced to 1 kilo of lovely fresh strawberries.
Squeeze over the juice of two organic lemons, removing the seeds.
Let rest for 30 minutes.
Then weigh 1 kilo of white sugar and add to the strawberry/lemon mixture.
Pour into a big non reactive saucepan (I used a non stick pan)
and bring to a boil, stirring constantly until the sugar is dissolved.
Place on lid and let cook away, on a high simmer for about 30 minutes.
Pour into sterilised jars, seal while hot and label with name and date.
This Strawberry Jam will keep for 12 months.
You can store it in your pantry, but once open it must be stored in the fridge.
Make sure you give some jam to friends, to share the strawberry joy!
To test if your jam is cooked enough, place a ceramic saucer in the freezer.
After 30 minutes put a small spoonful onto the saucer, place back in freezer
then take out and push with your finger. If little wrinkles occur then the jam is ready.
If not, cook for another 5 minutes and test again.
N.B. Sterilise jars by placing clean glass ones into your oven and turn to 150C.
Then turn off and leave jars inside while the jam is cooking.
I place the lids in a bowl and pour over boiling water, leaving for 10 minutes.
Bon Appetitio, Enjoy, Merryn.
Monday, 4 August 2014
Merryn's Menu: August Garden Share Collective Garden Overview
Merryn's Menu: August Garden Share Collective Garden Overview: Here we are in the last month of winter and the garden is flourishing. I am so happy that there are several self seeded rocket patches ...
August Garden Share Collective Garden Overview
Here we are in the last month of winter and the garden is flourishing.
I am so happy that there are several self seeded rocket patches throughout the garden,
often growing in bare patches of dirt = a double bonus = win win.

New capsicum plants are now producing this winter's crop of sweet green capsicum.
I prefer to pick them green and crisp and rarely let them turn red.

This banana bunch seems to be taking forever to ripen
but it is slowly and surely beginning to turn yellow.
We hope to start eating this bunch during this month.

Radicchio, also self seeded and a welcome addition to our vegetables.
The chickens love radicchio too so we need to grow extra for them.

Endive (scarole) grows quickly, is hardy and delicious fresh in salads
or lightly steamed or stir fried with cannelloni beans.

Celery, indispensable in minestrone and most soups.
Hardy and long lasting.

Home grown produce, the lowest hand of bananas cut to ripen indoors,
oranges from my parents (as our trees are only 3 years old)
and chillies from various homes in our street as I am between flowers and green chillies.
It still shows what can easily be grown in a 1km radius from here.

These seedlings are broccoletti, radishes, various lettuces and bok choi.
They have been in the ground for 1 month, the letttuce + bok choi will be ready to pick next week.
Shallots, rainbow chard, lettuce and more endive.
We are picking the shallots daily, as needed.

Broccoli, with small heads showing, cabbages and spinach, the cabbages
will be ready to pick in 2 - 3 weeks.

We have a huge diversity of vegetables growing at the moment,
plus tomatoes, our winter tomatoes are very strong this year.

I specially hand selected seeds reknown for growing in cold climates and it was a good decision.
I love picking tomatoes all through Winter.
This is a round up of my garden this month.
Please have a look at the other Garden Share Collective members gardens here.
Buon appetito, enjoy, Merryn.
Wednesday, 16 July 2014
Merryn's Menu: Truffle Salt - Made in my kitchen
Merryn's Menu: Truffle Salt - Made in my kitchen: Truffle Salt I love Truffle Salt, the delightfully aromatic and delicious salt that is perfect sprinkled on all foods, from fried eggs to vegetable tempura and roast beef. Delicious truffle salt is easy to make in your kitchen too!
Truffle Salt - Made in my kitchen
Truffle Salt

I love Truffle Salt, the delightfully aromatic and delicious salt that is perfect sprinkled on all foods, from fried eggs to vegetable fritters and fresh, hot steamed asparagus. Truffle Salt is incredibly Unique.
The first time I tried truffle salt was years ago when I purchased it directly from a Truffle Grower in Australia.
I was instantly smitten by the amazing taste sensation.
Since then a bottle is always in my pantry.

Here is a precious black truffle weighing 8.5 grams.

This is natural sea salt
purchased
from a health food store.

Place two 8.5 gram black truffles
into a small food processor or blender.
Pulse for one minute until they are roughly chopped.

Add 150g coarse natural sea salt
and whiz for 2 minutes.
You will see the black truffles chopped into
small pieces
small pieces
and combining with the sea salt.

Now, you have created truffle salt.
A truly originally flavoured salt
that tastes like nothing else you have ever eaten.
Sprinkle it on french fries, or spaghetti aglio, oilo e peperoncino
or perhaps a fresh rare piece of beef eye fillet.
Enjoy, the phenomenal aroma and exhilarating taste of truffle salt.
Buon appetito, enjoy, Merryn.
Monday, 7 July 2014
Merryn's Menu: Simple Sour Dough Starter for Sour Dough Bread
Merryn's Menu: Simple Sour Dough Starter for Sour Dough Bread: One thing I have always enjoyed successfully is baking. As a teenager when I baked my first loaf it was wonderful, had risen well and was c...
Simple Sour Dough Starter for Sour Dough Bread
One thing I have always enjoyed successfully is baking.
As a teenager when I baked my first loaf it was wonderful, had risen well and was crusty.
When I cooked sour dough bread last week it didn't occur to me that it may not work.
So I am surprised to learn that it can be difficult to achieve a light loaf.

Here is the Sour Dough Starter that my brother gave me a cup of to take home you can read the original recipe here.
Day 1: In a glass container mix one dessertspoon of wholegrain flour with one dessertspoon of unsweetened pineapple juice. Leave out of fridge on bench with lid ajar, so allowing air, but so that no bugs can crawl in.
Day 2: Repeat Day 1, allow mixture to rest.
Day 3: Add two dessertspoons of wholegrain flour and two dessertspoons pineapple juice and stir.
Day 4: Repeat Day 3, allow mixture to rest.
Day 5: Add four dessertspoons of wholegrain flour and four dessertspoons of pineapple juice.
Day 6: Repeat Day 5, allow to rest for remainder of the day.
Day 7: Your Sour Dough Starter is now created. It will now begin to ferment but it is a young organism.
Day 8: Store Sough Dough Starter in refrigerator, in a glass jar with the lid slightly open.
Day 10, 2, 14, 16, 18, 20 etc., every second day feed your Sour Dough Starter with 1 dessertspoon plain white flour and 1 dessertspoon bottled water (chlorine free - e.g. rainwater).
Day 22: Give your sister a cupful and make yourself a loaf of Sour Dough Bread.
N.B. If your kitchen is cold, you might have to wait an extra day after steps 2 and 4 before proceeding.
I believe the secret to baking light bread is to knead it as little as possible, until the mixture is just combined, then let the proving time for the dough do all of the work for you.

As a teenager when I baked my first loaf it was wonderful, had risen well and was crusty.
When I cooked sour dough bread last week it didn't occur to me that it may not work.
So I am surprised to learn that it can be difficult to achieve a light loaf.
You can see the Sour Dough Starter fermentation.
Here is the Sour Dough Starter that my brother gave me a cup of to take home you can read the original recipe here.
Day 1: In a glass container mix one dessertspoon of wholegrain flour with one dessertspoon of unsweetened pineapple juice. Leave out of fridge on bench with lid ajar, so allowing air, but so that no bugs can crawl in.
Day 2: Repeat Day 1, allow mixture to rest.
Day 3: Add two dessertspoons of wholegrain flour and two dessertspoons pineapple juice and stir.
Day 4: Repeat Day 3, allow mixture to rest.
Day 5: Add four dessertspoons of wholegrain flour and four dessertspoons of pineapple juice.
Day 6: Repeat Day 5, allow to rest for remainder of the day.
Day 7: Your Sour Dough Starter is now created. It will now begin to ferment but it is a young organism.
Day 8: Store Sough Dough Starter in refrigerator, in a glass jar with the lid slightly open.
Day 10, 2, 14, 16, 18, 20 etc., every second day feed your Sour Dough Starter with 1 dessertspoon plain white flour and 1 dessertspoon bottled water (chlorine free - e.g. rainwater).
Day 22: Give your sister a cupful and make yourself a loaf of Sour Dough Bread.
N.B. If your kitchen is cold, you might have to wait an extra day after steps 2 and 4 before proceeding.
I believe the secret to baking light bread is to knead it as little as possible, until the mixture is just combined, then let the proving time for the dough do all of the work for you.
The resulting Sour Dough Loaf.
Buon appetitio, enjoy Merryn.
Wednesday, 2 July 2014
Home Made Sourdough Bread
I have my brother to thank for getting me into the sour dough craze.

When I last visited Brett he had made some delicious and light sour dough bread.
He offered me sourdough starter in a jar with instructions to feed it
every second day with equal amounts of plain flour and bottled water.
So I dutifully took it home, stored it in the refrigerator slightly ajar and attended to it
every second day (almost). When there was enough product I asked Brett for his recipe.

Here is the dough ready to be baked at 180 celsius.
I know it's good for you, but I have only liked purchased sour dough loaves, when toasted ... until now.
This bread is light and delicious.
Brett's Sourdough Bread
2/3 cup sour dough starter culture1 1/4 cup filtered water
1 dessertspoon natural sea salt
1 1/4 cups plain flour
In a large bowl place the sour dough starter culture with the water and salt. Stir until mixed.
Add flour and mix together, using your hands to incorporate the flour.
Knead lightly just until all is combined.
Cover with glad wrap and let rise for at least 7 hours in a warm place.
Heat oven to 180 celsius.
Grease a loaf pan with butter.
Pour sour dough batter into pan.
Splash a little water on top and bake on lower shelf for 40 minutes turning once through cooking.
Bread is cooked when the mixture has left the sides of the pan and it sounds hollow when tapped on top.

Thanks Brett, for the sour dough starter and this great recipe.

Buon appetito, enjoy Merryn.
Tuesday, 1 July 2014
Merryn's Menu: July 2014 Garden Share Collective
Merryn's Menu: July 2014 Garden Share Collective: Welcome to another monthly viewing of all great gardens shared through The Garden Share Collective hosted by Lizzie at Strayed From The Table ...
July 2014 Garden Share Collective
Welcome to another monthly viewing of all great gardens shared through
The Garden Share Collective hosted by Lizzie at Strayed From The Table.

I am so pleased at how well the new herb garden has evolved.
Marjoram sits next to oregano, thyme, lemon thyme, tarragon, sage,
coriander, holy basil, chives, parsley and perennial coriander all growing happily together.

There are 6 custard apples on our custard apple tree that was planted 3 years ago, how exciting!

There is lavender planted around the garden, a delight for the honey bees.
Also beneficial for it's gorgeous aroma and delicate flavour to ice cream and biscuits.
My daughter informed me that everyone should have at least one lavender bush for the bees to enjoy.

The first blush of colour on the red papaya, though we have enjoyed some grated into a green papaya salad.

I hadn't noticed the ripening locquats
until my husband asked if the yellow burst
were flowers, fruit or dead leaves.
The fruit is much larger this year
and will undoubtedly also be sweeter.

The brassicas are slowly growing. Cauliflower and broccoli with a little spinach.
Notice the recycling of the old trampoline frame, upturned to provide a frame for shade cloth.

We had a hail storm here last weekend.
The lovely lettuce were slightly shredded
but I removed the outer leaves,
giving these to the chickens
and they are still growing strongly.
Picking the outer leaves from a dozen plants
daily are enough
to offer the family fresh salad.

The curly endive (escarole)
survived the hail storm.
Like lettuce, I pick what leaves
are needed and rarely
pluck the whole plant
from the ground.

Our winter shallots are ready for picking, aromatic and delightful.

We are eagerly awaiting this bunch of bananas to ripen, it will be picked in one month.
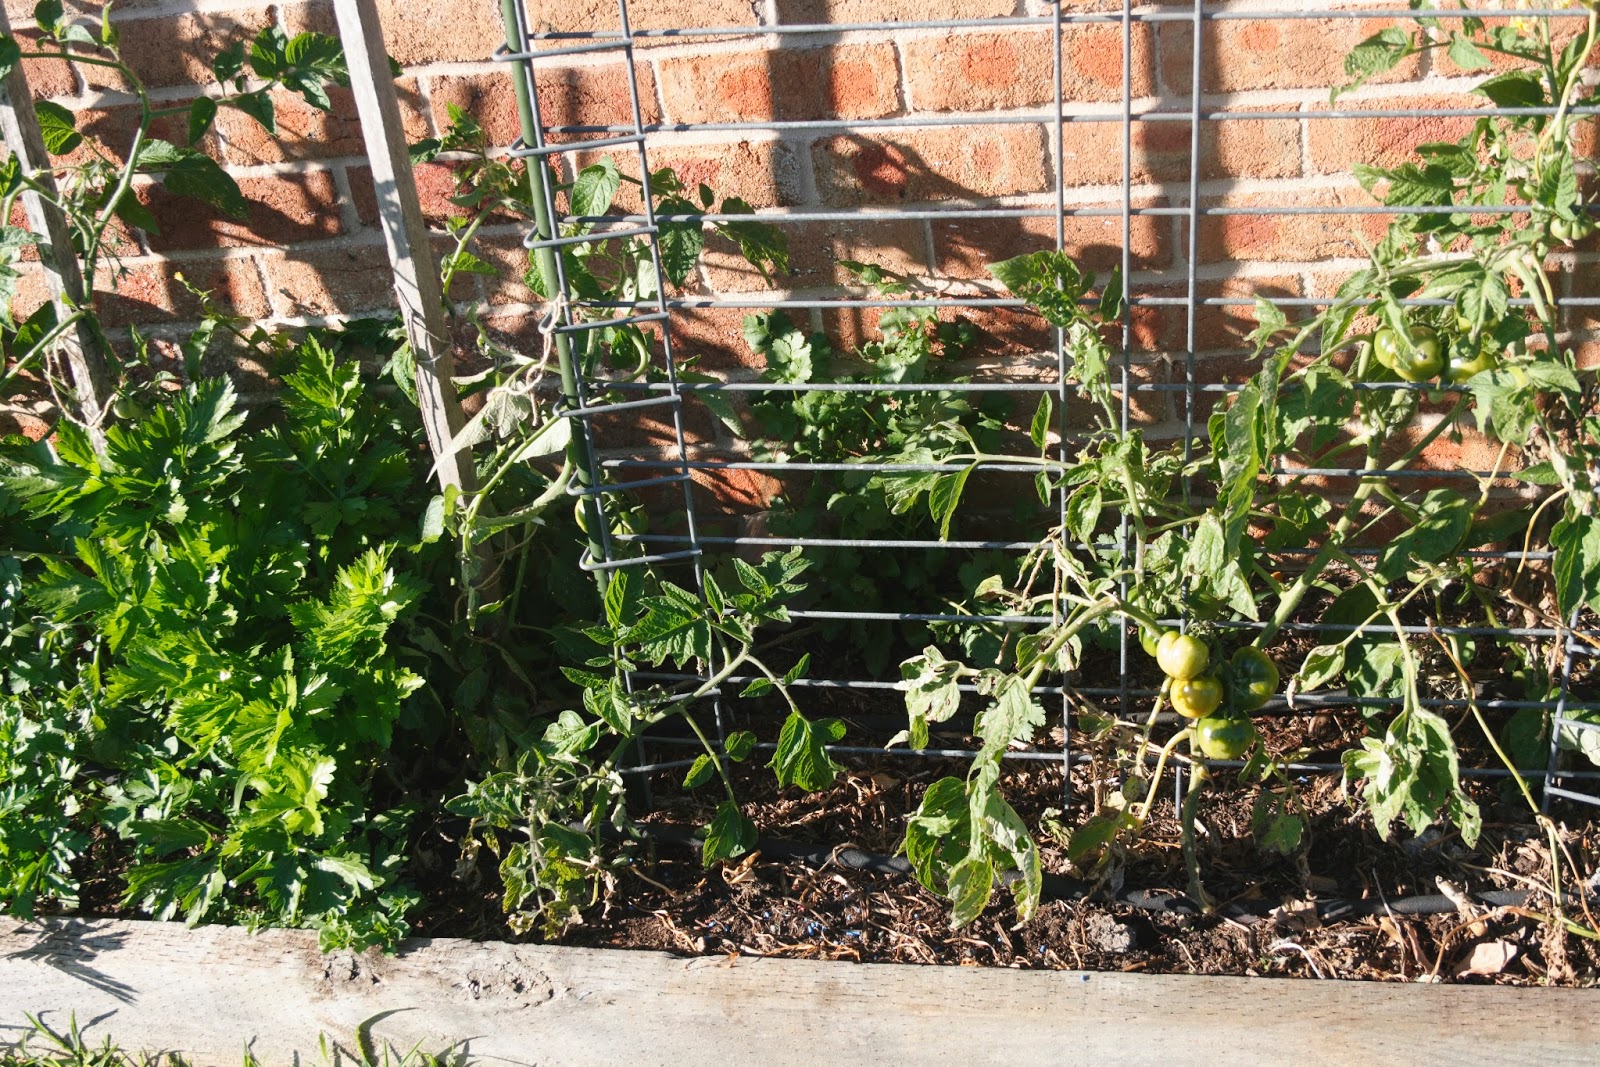
The piece de resistance are the July tomatoes,
remember we are in the mid north coast of New South Wales
and I am picking one nearly every day now.
So delicious.
The tomatoes are sharing their bed with celery, continental parsley and coriander.

The rampaging chickens now have an outdoor run.
They are still allowed to free range but there is now a good balance between
vegetables for human consumption and everything-else-that-chickens-eat.
~~~~~~~~~~~~~~~~~~~~~~~~~
This week I planted two rows of snow peas,
a small bed of Australian garlic,
an elderberry shrub,
some more lavender cuttings
and horseradish.
Who says winter gardening is boring!!?
Buon appetito, enjoy Merryn
Subscribe to:
Posts (Atom)