Wednesday 26 June 2013

My June Garden


Winter is a Gardener's Delight

We have already passed the shortest day of the year on the mid north coast of New South Wales and now each day gains 1 minute of sunshine each afternoon.  This is a wonderful gardening season with so many vegetables and fruits in season.

Look at these gorgeous cabbages, simply bursting with colour and flavour.


They are growing in a bed with other brassicas - broccoli and cauliflower.


Here are broccoli plants, so easy to grow and when you cut the main head, other smaller stalks will grow, much like broccolini so you get longevity from each plant.  


We will be harvesting broccoli for at least the next 6 weeks, the slimmer buds will last another month after that and are just as delicious.  We also have seedling plants grown from seed to start in another bed to ensure continual broccoli for the next few months.


On the right is one of our cauliflower plants in the same bed.  The lovely white cauliflower heads are yet to appear, these plants have been growing for 6 weeks and we will start harvesting cauliflowers about 4 - 6 weeks from now.


This lemonade tree has been in the ground for 2 years.  It produced 3 lemonades last year and this year has many more.  I have picked one and they will be ripening for the next month, with one or two ready every week.  Then it will be pruned before Spring to encourage strong branches.

This Kumquat tree was purchased last December and it is already bursting with fresh, sweet, edible Kumquats.

What an abundant Kale patch!  Kale is so versatile and so easy to grow. You could plant it in a pot and pick the leaves as needed.


Who said you can't grow tomatoes in winter?
We live halfway between Sydney and Coffs Harbour and grow beautiful red tomatoes all year long in front of a north facing brick wall that gets sun continually all day long.


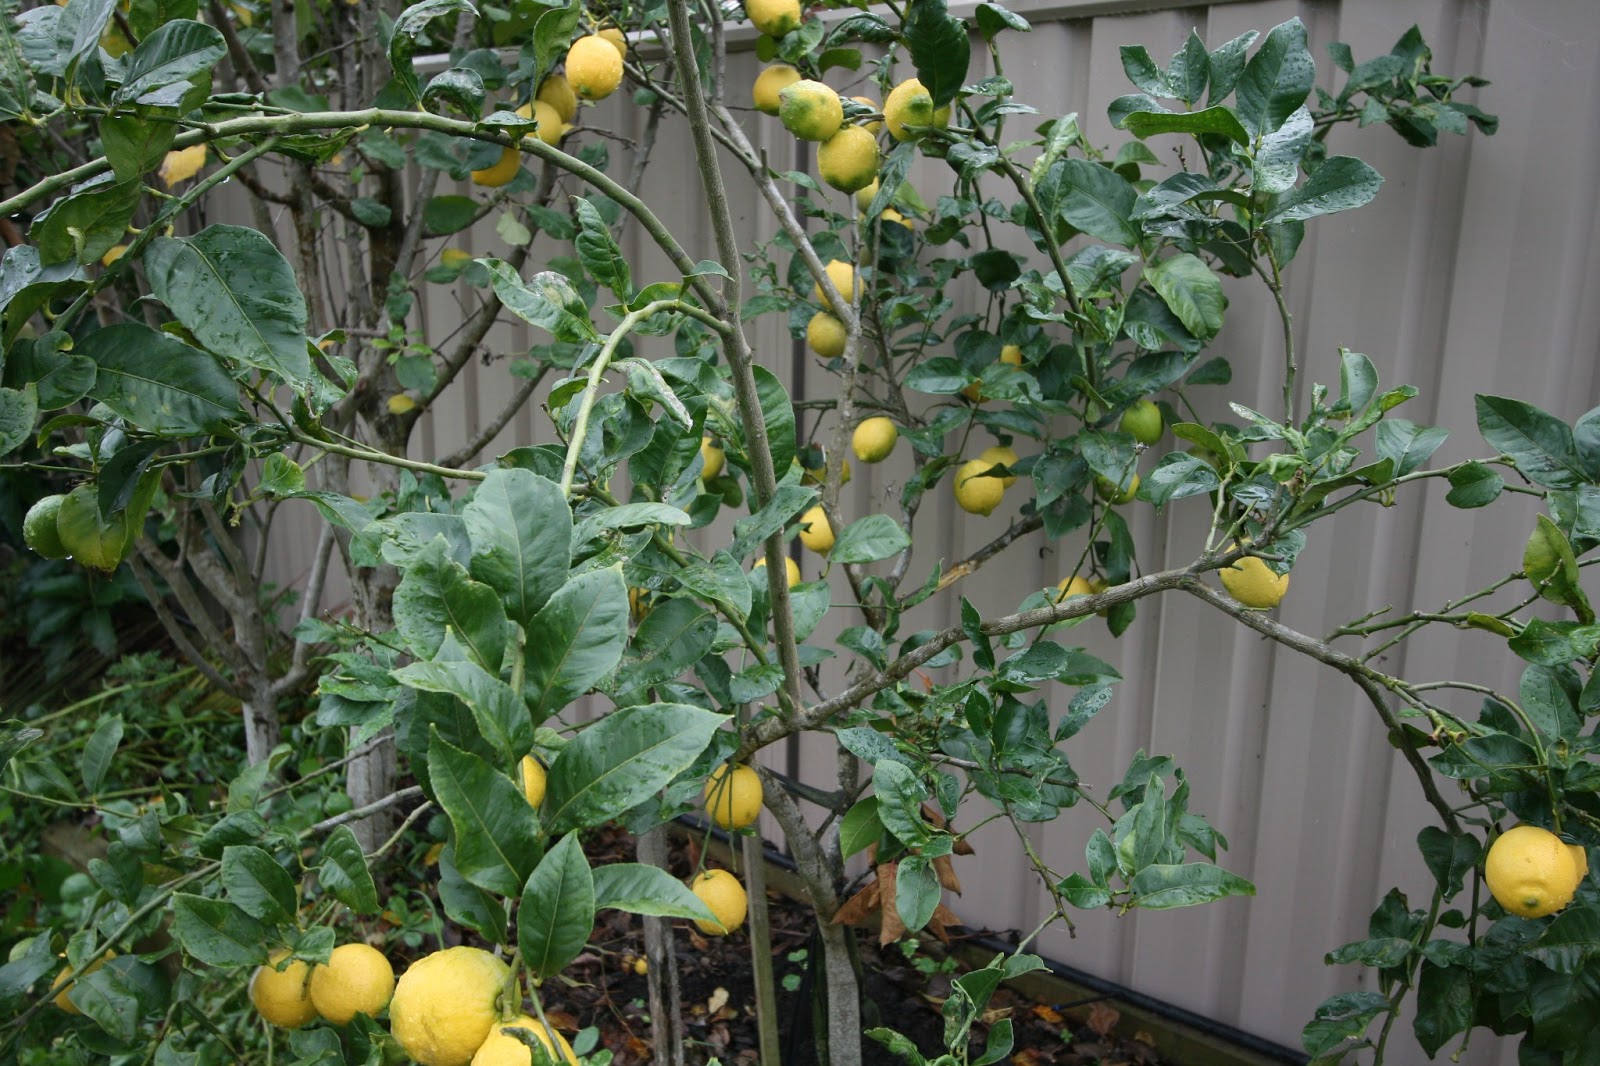
The lemon tree has a magnificent crop of lemons this year.
Our lovely Cavendish bananas are nearly fully formed and will be perfect for eating in approx 8 weeks' time.


This is our baby bok choi patch.
Note the use of plastic PET bottles to help them get established.  These plastic bottles stay on the fledgling seedlings for 2 weeks to help them grow and protect them from the chickens.

You can pick individual leaves from the pak choi or pluck the entire vegetable for cooking.

Spinach is a staple in our garden.  Grown all year long it is a very useful and easy to grow vegetable.


Celery as well is great in Summer for salads and wonderful in winter for soups and stir fries.
Pick the stems and leaves as needed.  Also wonderful for growing in a pot.


 This is a loquat tree my husband planted and this Winter is the first time I have tasted one!  It is an evergreen tree and the fruit is yellow and sweet.  You eat the skin as well as the flesh which surrounds one or two semi large seeds.  An absolutely delicious delight.

Here are fledgling broad beans.  About 30cm high now, they will crop in another 8 weeks.
We have started off more seeds to ensure this vegetable is available for the next four months.


Here a bee is collecting pollen from the Thai basil plant (also known as holy basil)  
to take back to the hive.  Thai basil grows abundantly in the warmer months and dies back in winter. 
 It is yet to die back but our Winter has so far been quite warm.
  It rejuvenates in Spring and the leaves burst forth from the naked plant stems.  


Sorrel and lettuce grow all year around and are an invaluable addition to any garden.


Sorrel on the left and various lettuces, iceberg, red oak and green coral lettuce grow with spinach and celery.   We plant marigolds to help deter insect pests and place golf balls to deter the white moths from laying their eggs on the leaves.


These are the highlights of our winter June garden and it is so rewarding growing these gorgeous vegetables, watching the fruits grow and ripen on the trees and enjoying the wonder of nature.

Monday 17 June 2013

Leek and Chicken Pie

(Or) Chicken and Leek Pie

I love this delicious Leek and Chicken pie that came about because we had a huge patch of leeks and it seemed a natural choice for a pie.  Winter is all about comfort food, homely pies with broccoli and potatoes.
This pie is a burst of fresh flavour and welcoming to the family table.


                              When I made a chicken and leek pie
                          I discovered how delectable this pie could be,
           purely because we had some luscious leeks in our garden.


Chicken and Leek Pie Recipe

This quantity makes 2 large family size pies  Recipe is suitable to freeze when cooked.

1/3 cup butter
1 kilo chicken thigh fillets, fat removed and chopped into 1cm squares
3 leeks, split in half lengthways, washed and finely chopped
2 medium onions, finely chopped
2 garlic cloves, finely chopped
2 heaped Tablespoons plain flour
8 fresh thyme sprigs (or 1 teaspoon dried thyme)
1/2 cup chopped continental parsley
2 Tablespoons worcestershire sauce
1 cup chicken stock
Freshly ground black pepper and salt to taste

Pastry
2 x quantity Provencal Pastry as used in my Spanokopita recipe

Make pastry first so it can rest while you cook the leek and chicken filling
After refrigerating the dough for 1 hour, divide into half and then divide each half again, with one ball slightly bigger than the other, the big one is for the base so the dough comes up the sides of the pan.
Roll out to fit pan, there is no need to grease a ceramic pie pan.

Heat oven to 200 Celscius


Filling

Melt the butter and gently fry the leeks for 5 minutes before adding chopped onion and garlic and frying for a further 8 minutes until they are soft.  Add the chicken bits, stirring until all are browned.
Put the flour in the pan, mixing it through the ingredients, this will thicken the sauce.
Add parsley, thyme, worcestershire sauce, pepper and chicken stock, cooking for about 5 minutes until sufficiently thickened.  Taste and see if it needs a little salt, as the chicken stock can be salty enough by itself.

Pour half into each pastry lined pie pan.

Roll out the remaining two smaller dough portions to fit as the pie lid.  Place on top of the filling and gently fold bottom edges over to create a rustic look.

Brush with olive oil and bake at 200 Celsius for 15 minutes then lower the heat to 180 Celsius for a further 5 minutes.


My two Leek and Chicken Pies
One for us, one for my parents.
So much better than
steak and kidney pie, any day.


If you enjoyed this post, please tell me and share it with your friends.
Buon appetito, cheers Merryn :D

Friday 7 June 2013

Home Made Feta Cheese

Home Made Feta Cheese

I have made ricotta and mozzarella cheeses for many years and have wanted to further explore the wonderful world of cheesemaking.  To this end I ventured to a nearby brewing supplies shop to purchase lipase.
All fired up to make Feta Cheese, but lo and behold, the lipase had disappeared.  
It was hiding in the pantry somewhere ... 

Serving Suggestion

Not deterred I looked online and found this great recipe from http://fromthebartolinikitchens.com
which uses fresh yoghurt for a culture substitute for the lipase.

Home Made Feta Cheese Recipe

4 litres milk, cow's, goat's or sheep's milk can be used
(Remember, the fresher and better quality the milk used, the better your cheese will be)
(you can use pastuerised, but not ultra pastuerised or homogenised.)
2 tablespoons live culture, plain yoghurt mixed with 2 tablespoons milk from above
1/2 rennet tablet mixed with 150ml distilled water 
1 teaspoon salt

For brining solution;  5 1/2 tablespoons salt for every 600ml fluid whey


Method

Warm the milk in a large pot with a lid until it reaches 30C or 86F stirring it occasionally to prevent the bottom from sticking.


Remove from heat, add yoghurt/milk mixture, stir well, cover with lid and let sit at room temperature for 1 hour.


Place in a spot where it will not be disturbed then pour in the dissolved rennet, stir well and cover the pot, leave overnight, do not lift lid or move pan.


A clean break is achieved

The next morning, the cheese should be set into one large block of curd with a little whey.
Test for a clean break  ->
this means the curd is firmly set from top to bottom.  Your finger should come up cleanly with the curd.
If not, cover and leave for another 2 hours, check again.
 If a clean break is still not achieved cover and leave for 2 more hours.
If you still get a bad break, discard and start a fresh batch.


Using a long knife, cut parallel lines through the entire thickness of the curd slicing it into vertical lines
Then turn the pot and cut horizontal parallel lines throughout the entire thickness of the curd.  Then turn your knife and slice on an angle.
Allow the curds to sit for 15 minutes, stirring occasionally to allow more whey to come out.  You will notice the curds shrink slightly in size.


Now to strain the cheese.
Line a colander with muslin or cheesecloth.  Gently pour in the curds, catching the whey in a container.
You will need the whey for
storing the cheese.
 When most of the whey has strained, collect the four corners of muslin and tie to form a knot to allow you to suspend the muslin and
allow it to strain for 2 - 4 hours.


The whey collecting underneath


If you live in a warm place you could allow it to strain in the fridge.
After it is well drained mix in 1 teaspoon sea salt.

Now line a mold with muslin and place the cheese inside, folding over the muslin.

Place a heavy weight on top and leave overnight, placing in the fridge if you live in a warm climate.


Then next day unmold and admire your feta cheese. Make a brine solution by adding 5 1/2 tablespoons of sea salt for ever 600 ml of whey and mix, dissolving the salt as much as possible.              


This serving is sprinkled with freshly chopped marjoram, finely sliced garlic, cracked black pepper, sliced red chilli and drizzled with extra virgin olive oil.

The texture is firm and the flavour is delicious.

If you enjoyed this post, kindly tell me.  
Buon appetito!  Cheers Merryn :D