Friday, 28 November 2014

Home Made Wine Making

It is with pleasure I report how good the wine I made at Christmas is to drink after 9 months of aging.

Last Christmas we had a lot of grapes ripen.  We ate them fresh, I made jam (mainly for my parents), protected them with netting from the birds and still ate more.  There were kilos and kilos of the gorgeous, plump grapes, far too many to consume by eating alone.

As it was my Christmas break - 3 1/2 weeks of glorious sunny holidays  I decided to make wine.


After doing research from existing cookbooks and online research I went to buy essential equipment.
It was New Years Day and nearly every store was closed so we took a day trip to Port Macquarie and bought goodies including plastic 'vats', airlocks, yeast, hydrometer and steriliser.

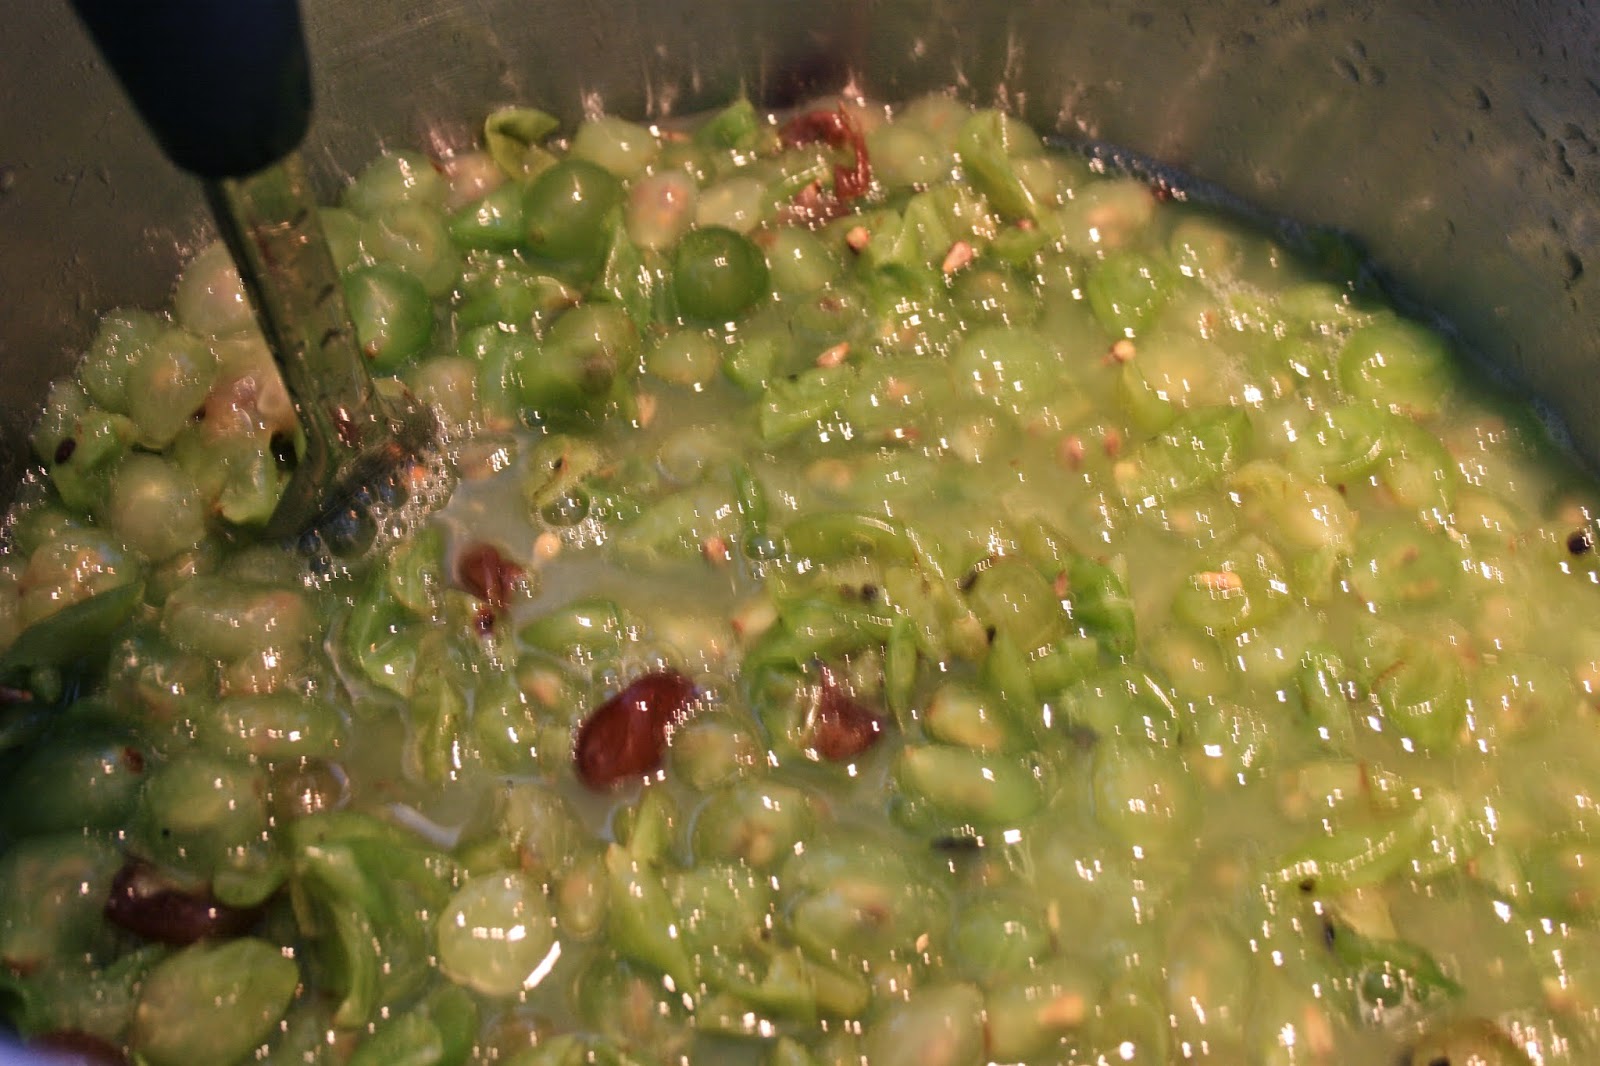


It was impossible to buy a grape press so I improvised and purchased two large colanders and a strong masher to squash the juice from the grapes.  It took muscles and a lot of effort to obtain the precious grape juice.  My mother, husband and teenagers helped to squash the grapes
(yes naturally our Italian friends asked if we had washed our feet first).

Then I suspended the skins and seeds in muslin to extract every last drop of grape juice 
(or grape must by which it is known).
Then I weighed the juice and placed the grape must into sterilised vats
using a hydrometer to test for acidity.

Luckily I WROTE DOWN EVERY DETAIL for future reference.

Warning:  My diary is quite lengthy. 

Day 1 Pressed 7kg mixed white/pink & red grapes,  7 litres of must
Placed into vat and added 1/4 teaspoon metabisulfite, stirred and covered with a tea towel tied on by a rubber band.

Day 4 8am   Tested with hydrometer, at 1060 acid is 5% (should be 3.8%) so I added 2 cups white sugar, stirred and put tea towel back on top.   at 9pm hydrometer reading 1080 (perfect!)  Acidity however was raised to 6%

Day 5 Added 2 litres cooled boiled water and another 1/4 teaspoon metabisulfite.


Day 6 Hydrometer 1060 acidity 5% so I added 1 1/2cups sugar and 1.5 litres water.

Day 8 Hydrometer 1070 Acidity 4.1% I then added 500ml water and 1/2 cup sugar.
2 hours later Hydrometer 1070 Acid 5% then added 1 cup sugar
2 hours later  Added 700ml water
4 hours later Hydrometer read 1075 Acidity was 5%
at 9pm I added 2 teaspoons citric acid
Day 9 Hydrometer 1075Acidity 6.2% which meant I added 2 tspns cream of tartar and 1/2 cup sugar
Yeast is added!  4g white wine yeast stirred into mixture then I put on the airlock.


I am definitely learning quickly on this journey and having fun with this project. 

By midday the mixture is bubbling away.                                
There is a bubble every 1.2 seconds in the airlock, this is exciting. 
After 3 days the bubbling has stopped so I open the vat and taste to find the flavour is quite bitter.      I added 1  1/2 litres of cooled boiled water and 500g sugar.
It rested for one week then I added 2 litres more of fresh grape must with 1/4 tspn of metabisulfite.
2 days later which meant it is now;

Day 19 I added 1 cup sugar and 4g dried wine yeast.
I put the airlock back on and after 3 days I added 1kg sugar, putting the airlock back on.

Now, on Day 27 IT IS READY FOR BOTTLING.


I had saved glass wine bottles for months and bought 4 litre glass flagons as well.
They were washed in hot soapy water, rinsed and sterilised with the sterilising solution.

From this batch I bottled an impressive 14 litres of WINE
with 10% alcohol content and 7% acidity.

At this time the wine tastes okay, it is neither sweet nor sour, it just tastes pleasant.


Even my non-drinking parents were impressed,  I was ecstatic!

On the long weekend in June we tried a bottle but it was not very nice, I thought I had made a lot of vinegar.  Then on the long weekend in October, 9 months later, I tried the wine again and was pleasantly surprised that it was not only drinkable, it was actually very lovely and refreshing.

This year, I have purchased a stainless steel wine press to squash the grapes.  Bring on the grapes!

Buon appetito, I hope you have enjoyed this wine making tutorial.
Enjoy, Merryn.


Wednesday, 19 November 2014

Home made Cough Syrup that actually tastes good.

Friends were visiting the other day and I offered the gentleman a glass of water as his coca cola was finished.  "No thanks" he said, "I don't drink water, water rusts you from the inside".  

I don't think I will ever forget this quote Trevor.

Dylan has had a cough for two weeks, one of those nagging, dry coughs that hang around forever.
He doesn't like the traditional cough lozenges so I made a bottle of simple,  home made cough syrup from ingredients in the cupboard.

I have to share this recipe as it works and  is easy to drink as it tastes good.

I thank Wellness Mama for her suggestion.


Make it and store in the refrigerator for up to two months, if it lasts that long.


Note the scribbly hand writing as a last minute thought, before I planned to share it here.

Home Made Cough Syrup
1 litre of filtered water (I used rainwater)
1/2 cup chopped fresh ginger
1/4 cup dried chamomile flowers
1/4 cup dried marshmallow root
1 tablespoon cinnamon
1/4 cup lemon juice
1 cup honey

Put the ginger and herbs into a medium saucepan and add the water.
Bring to a boil and reduce to a simmer.  Simmer until the quantity is reduced to half.  
Pour through muslin or cheesecloth to strain the herbs out, discard the herbs.
While the liquid is still warm mix with the freshly squeezed lemon juice and honey.
Mix well.  Store into a sterilised air tight container, label and keep in fridge for up to 2 months.
Give 1 teaspoon to children and 1 tablespoon to adults as needed for symptoms.

(Dylan is having a medicine cup full per time, it is really helping his cough and sleeping.)

Bon appetito, enjoy, Merryn xx


Monday, 10 November 2014

Bottarga Made at Home


Home Made Bottarga from freshly caught fish

Thanks to a sweet friend who gave us flathead fillets, especially the sweet tails.
He also generously gave us some fresh, whole flathead fish roe.
I have been keen to get my hands on some roe to make Bottarga - a salted, preserved fish roe.
This is prevalent in Sardinia and specific Italian coastal communities 
make Bottarga as their own specialty product.


Bottarga is salted, cured fish roe and it is traditionally finely sliced or crumbled onto pasta.
   Try sprinkling some crumbled Bottarga onto Aglio e olio (garlic and oil spaghettini).
  It can also be added over bean or asparagus dishes for an intense addition of flavour.


1.  Gently wash and then place the fish roe sacs into salted water and leave overnight.


2.  Next day:
Drain the fish roe on absorbent paper, blotting dry very gently, you don't want to break the sacs.


3.  Gently coat the sacs in a little olive oil, turning to coat them completely.


4.  Roll in pure coarse sea salt and place on fresh, absorbent paper.


5.  Cover all of the sacs with fine sea salt, making sure they do not touch each other.


Cover with muslin to keep any bugs away.
All you can see is a salt filled bowl.


6.  Check after four days, you may need to change the absorbent paper and add more fine sea salt.
 Here I additionally used an anti-insect cover to protect the bottarga.


On day 7 check the bottarga again to see if paper needs replacing and to ensure they are salt coated.

7.  After fourteen days here is the completed project.
It is cured after ten days but it doesn't hurt to leave it a bit longer.

Remove the bottarga from most of the salt, a little salt will still cling to them.
To store, vacuum seal or place in a glass jar in the fridge or store in freezer for up to one year.
When a piece of bottarga is sliced or ground the rest will lose flavour quickly so use all of the piece.
Try it over pasta and please, tell me what you think of the intense flavour.

Bon appetito, Enjoy Merryn xx

Monday, 3 November 2014

Merryn's Menu: November 2014 Garden Share Collective

Merryn's Menu: November 2014 Garden Share Collective: The bees are buzzing, the vegetable flowers are flourishing and everything is G-R-O-W-I-N-G. These lovely crisp beans are hanging ri...

November 2014 Garden Share Collective

The bees are buzzing, the vegetable flowers are flourishing and everything is G-R-O-W-I-N-G.


These lovely crisp beans are hanging ripely for the picking.  
They will grow for months and we will still be picking from the same vines in January.


Picking out the strawberry plants to weed their roots and top up the bed with compost and dirt, there were enough strawberry plants to make two patches.  Hence there are strawberries to be picked daily.
I prefer to pick them at the end of the day when the sun is lower and they have ripened all day.


Artichokes are especially a seasonal delight.  I picked the first ones last weekend and will pick about three weekly for a few weeks.  The plants are perennial so this artichoke bush will be even stronger next summer.  I simmer the artichokes and simply serve them with a hollandaise sauce for dipping.


 These shallots are flowering, so the seeds will blow in the wind and produce more shallots.


Likewise, we are now letting the radishes and lettuce go to seed as well 
so the next plants will be a pleasant surprise when they pop up, well, everywhere.


The leeks are now producing baby leek " puppies " so I hope they grow to maturity 
after the main leek has been picked.


Here are the baby grapes.  This is the second year for the vines.
There are Thompson Seedless, Golden Muscat, Black Isabella and Pink Iona amongst others.
They will be netted when the flowers have finished and the bees have fertilised them all.


This corn, grown from seed is growing daily and as well as pleasant eating,
also create a delightful wind break for a while.
The husks are dried and we burn these in the bee smoker for a pleasant stream of smoke. 

 After 3 and 4 years in the ground our olive trees are flourishing and are about to produce fruit!
I cannot begin to describe how excited I am by this happening.
Last year we harvested 20 and they were the sweetest olives I have ever pickled.
This year, I believe there will be at least one or two buckets = how wonderful.


These broad beans were planted a bit late but have now come to fruition.
There will be broad beans daily, or bi daily for weeks to come.

It really is a dynamic time in the garden, we are also growing cucumbers, zucchinis, tomatoes, snow peas, soy beans, lettuce, fennel, kale, garlic, chillies, capsicum, eggplant and broccoli,

Please, browse the other gardens of all members of the Garden Share Collective.
You will be amazed at the variety of vegetables and fruit that can be grown.
Till next month, bon appetito, enjoy, Merryn.

Monday, 27 October 2014

Merryn's Menu: Prawn and Bacon Salad with Macadamia Nuts

Merryn's Menu: Prawn and Bacon Salad with Macadamia Nuts: I think the title says it all.  I was walking along the break wall this morning and on the return journey thought about what to cook for dinner.  The lake inspired me, with the sweet crisp prawns that are netted from here, they are so fresh.  The macadamia nuts are a decadent addition.

Prawn and Bacon Salad with Macadamia Nuts


I think the title says it all.  I was walking along the break wall this morning and on the return journey thought about what to cook for dinner and also what to eat for lunch.


Our northern break wall is a refreshing walk, everyone says "Good Morning", it is superb. 
Locals and tourists alike delight in the morning walk and the pleasantries exchanged.


On my return walk and inspired by the beautiful lake I decided to buy fresh, local prawns for lunch.
The taste of locally caught lake prawns is insurmountable.  They are so sweet and crisp.


It is so simple, on a gorgeous sunny day to create a luscious, colourful salad for one, for lunch.

Prawn and Bacon Salad with Macadamia Nuts

100g fresh, locally caught prawns, peeled, deveined and washed
3 rashers bacon
4 large lettuce leaves
10 whole macadamia nuts
8 cherry tomatoes
Ranch dressing
salt, pepper

Fry the bacon in a little olive oil until crisp.  Cool, then slice finely.
Wash and chop the lettuce leaves, I used cos, iceberg and red coral lettuce.
Place the lettuce on a large plate, sprinkle with the shredded bacon and cherry tomatoes.
Top with the washed prawns and place the ranch dressing liberally over the top.
Add salt and pepper to taste, then top with the macadamia nuts.
Serve, with a glass of icy cold water.

Ideally, eat outside on a warm day. 


Bon appetito, Enjoy Merryn.


Thursday, 16 October 2014

Merryn's Menu: Easy Red Velvet Cake

Merryn's Menu: Easy Red Velvet Cake: A few years ago, I think between Children No 2 and 3 our dear friend came to have Christmas Eve dinner with us.  Her husband was working and she came over for an Indian feast.  Little did I know she would have a food reaction to the red food colouring I used.

Merryn's Menu: Quick Baked Strawberries

Merryn's Menu: Quick Baked Strawberries: We have a big strawberry patch, in fact we have two patches.  Two is usually better than one. This past month saw me lifting out the strawberries to weed and renew them.  There were sufficient to bake with sugar, lemon zest and verjuice.  Delicious.

Quick Baked Strawberries

We have a big strawberry patch, in fact we have two patches.  Two is usually better than one.
This past month saw me lifting out the strawberry plants and extracting weeds from their roots.
Hubby topped up the bed with compost and dirt and laid new straw on top of the bed.
Then the strawberry plants were replaced into the rejuvenated bed and now they are flourishing.


Look at these lovely plump strawberries.
The gorgeous hippeastrums were gifted from a dear, sweet friend. 


These are so simple to bake.   I popped in a bowl full while my Red Velvet Cake was cooking.
This recipe came from an old, dear Italian friend who also loves her garden produce.

Baked Strawberries

2 cups strawberries
1/4 cup castor sugar
grated zest of one lemon
3 tablespoons verjuice

Wash and hull strawberries then place into an oven proof bowl.
Sprinkle over the sugar and lemon zest then splash with the verjuice.
Cover with alfoil and bake at 170 celsius for 15 minutes, until soft.   

Isn't it amazing how we learn and offer so many good food ideas with our friends.

Bon appetito, enjoy Merryn.

Easy Red Velvet Cake

A few years ago, I think between Children No 2 and 3 our dear friend came to have Christmas Eve dinner with us.  Her husband was working and no one wants to be alone on Christmas Eve.
I was heavily into cooking Indian food at the time (I still adore Indian food - the hotter, the better).
We had a wonderful night and a fantastic dinner with six courses of gorgeous Indian food.
Around 10.30pm our friend bade us goodnight with kisses and warm Christmas wishes.


She called on the 30th December to wish my husband a happy birthday and told us that when 
she arrived home on Christmas Eve her body was nearly red all over with a rash.
So, our dear friend spent Christmas in a hospital bed.


What did you put in the food that caused a food allergy? she wanted to know.
I cooked with all of the usual ingredients, but added red food colouring to the Tandoori marinade.


Sine then, I have been very cautious about using red food colouring, 
hence my red velvet cake is not as red as some I have seen.
The red colouring is purely colouring, not flavouring so therefore entirely optional.


This dear friend, is still a dear friend I am pleased to say.
So tell me, have you ever poisoned a friend with your cooking?


Red Velvet Cake

2 free range eggs
1 1/4 cups castor sugar
1 1/2 teaspoons salt
1 cup (250ml) rice bran oil
2 teaspoons pure vanilla extract
2/3 cup (150ml) milk with 1 tablespoon white vinegar added to it
2 teaspoons bicarbonate of soda
2 1/2 teaspoons apple cider vinegar
1 2/3 cups plain flour
2 small tablespoons cocoa powder
1 teaspoon red food colouring

Preheat oven to 170 celsius.
Whisk eggs, salt, sugar and vanilla extract together in a large mixing bowl.  While whisking pour in the oil in a steady stream and continue whisking until well combined.  
Pour the cider vinegar into the milk and add the sifted bicarbonate of soda.
Mix the sifted cocoa with the flour.
Add 1/3 of the flour mixture to the egg mixture and stir gently until mixed through.  Add half of the milk mixture and stir through.
Than another 1/3 of the flour, mix, then the rest of the milk and finally gently stir through the remaining flour mixture.  Mix until well combined.  Add the desired amount of food colouring.
Pour into a round 20cm paper lined and greased baking pan.
Place on middle shelf of oven and bake for 45 minutes.  

I iced mine with a simple icing of 2 cups icing sugar, 2 tablespoons butter and 2 tablespoons milk.
Heat butter and milk together in a small bowl in the microwave, then add the icing sugar until well mixed.    Purely because my family do not like butter cream or the heavier icings.

Served here with a lovely, plump baked strawberry.

Bon appetito, enjoy Merryn.

Tuesday, 14 October 2014

Eggplant and Tomato Galette

I had to smile this morning when opening the mail. 
 My Mother is in New Zealand and sent me this card.


The information is not very detailed but I know she is in Auckland and she is well,
plus she is thinking about us.
Minimal information
that is quite endearing.
Mum is not very 
electronically minded
but she has a heart of gold.


It confirms the theory that less is more,
much like this simple Eggplant Galette.
technically simple yet full of warmth.


This is one of those those simple, straightforward recipes where you put it together, 
place it in the oven then find 40 minutes later, lunch is served.


There are variations to this recipe but I love that the eggplant can be sliced and added, stress free.
This recipe is loosely based on one I found here tomato and eggplant galette.

Galette Pastry

1 1/2 cups plain flour
pinch of salt
1/2 cup unsalted butter, cut into small cubes
1/4 cup ice cold water

Place flour, salt and butter into food processor and process until it resembles fine breadcrumbs.
Then add the water in a slow drizzle until it comes together as a ball.  You may need to add another tablespoon of water.  When ball stage is reached, wrap in plastic and refrigerate for 30 minutes.

Eggplant Filling

2 tablespoons extra virgin olive oil
1 eggplant, cut into 0.5cm round slices
3 large tomatoes, cut into 0.5cm slices
salt and pepper
1 1/2 cups grated mozzarella cheese
2/3 cup grated parmesan cheese
4 tablespoons chopped fresh basil leaves
2 extra tablespoons virgin olive oil

1 egg yolk mixed with 3 tablespoons milk for an egg wash

Preheat oven to 180 celsius.  
On a floured surface roll dough to a 35cm circle.  Place dough onto a baking tray lined with baking paper.   Brush the extra virgin olive oil over pastry, leaving a 5cm border at the edge untouched. 
Distribute the mozzarella and 1/3 cup of the fresh parmesan cheese over the base, leaving the 5cm border bare.  
Place a row of eggplant slices on top of the cheese, slightly overlapping them.  Add a row of tomatoes on top, sprinkle with salt and pepper and a little basil.
Place one more row of eggplant slices on top with another row of tomatoes on top of the eggplant. Season with more salt and pepper and the remaining basil.  Drizzle with the extra virgin olive oil.
Fold up sides to make an open pie.  
Brush with the egg wash and sprinkle over the remaining parmesan cheese, including onto the pastry.
Bake in the preheated oven for 40 minutes or until lightly golden and the vegetables are soft.


Roll the dough and place cheese then
vegetables on top, leaving a 5cm  border.

Lift up sides of pasty, brush with egg wash and sprinkle all over with fresh parmesan cheese.


The side view when sliced.

I will bake this for lunch for my parents when my mother returns from NZ.
Bon appetito, enjoy, Merryn.