Monday, 4 August 2014

August Garden Share Collective Garden Overview

Here we are in the last month of winter and the garden is flourishing.

I am so happy that there are several self seeded rocket patches throughout the garden,
often growing in bare patches of dirt = a double bonus = win win.


New capsicum plants are now producing this winter's crop of sweet green capsicum.
I prefer to pick them green and crisp and rarely let them turn red.


This banana bunch seems to be taking forever to ripen
but it is slowly and surely beginning to turn yellow.
We hope to start eating this bunch during this month.


Radicchio, also self seeded and a welcome addition to our vegetables.
The chickens love radicchio too so we need to grow extra for them.


Endive (scarole) grows quickly, is hardy and delicious fresh in salads 
or lightly steamed or stir fried with cannelloni beans.


Celery, indispensable in minestrone and most soups.
Hardy and long lasting.


Home grown produce, the lowest hand of bananas cut to ripen indoors,
oranges from my parents (as our trees are only 3 years old) 
and chillies from various homes in our street as I am between flowers and green chillies.
It still shows what can easily be grown in a 1km radius from here.


These seedlings are broccoletti, radishes, various lettuces and bok choi. 
They have been in the ground for 1 month, the letttuce + bok choi will be ready to pick next week.


Shallots, rainbow chard, lettuce and more endive.
We are picking the shallots daily, as needed.


Broccoli, with small heads showing, cabbages and spinach, the cabbages
will be ready to pick in 2 - 3 weeks.


We have a huge diversity of vegetables growing at the moment, 
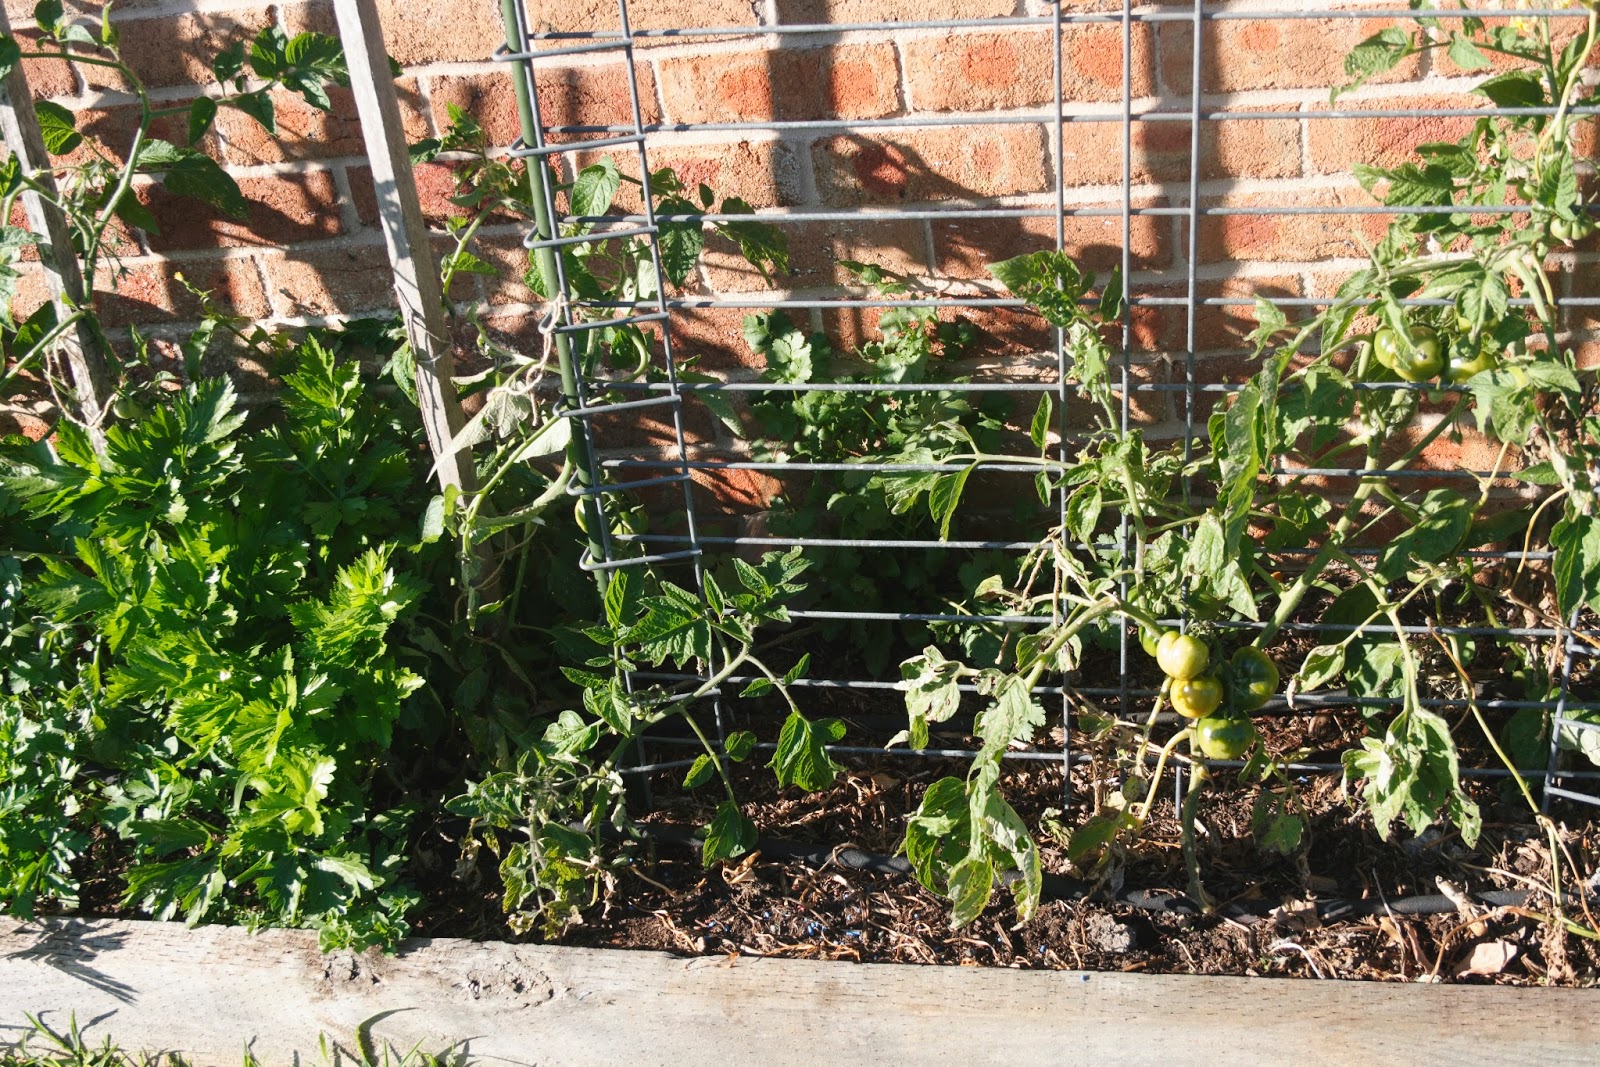
plus tomatoes, our winter tomatoes are very strong this year.


I specially hand selected seeds reknown for growing in cold climates and it was a good decision.
I love picking tomatoes all through Winter.

This is a round up of my garden this month.
Please have a look at the other Garden Share Collective members gardens here.

Buon appetito, enjoy, Merryn.

Wednesday, 16 July 2014

Merryn's Menu: Truffle Salt - Made in my kitchen

Merryn's Menu: Truffle Salt - Made in my kitchen:  Truffle Salt I love Truffle Salt, the delightfully aromatic and delicious salt that is perfect sprinkled on all foods, from fried eggs to vegetable tempura and roast beef.  Delicious truffle salt is easy to make in your kitchen too!

Truffle Salt - Made in my kitchen

 Truffle Salt


I love Truffle Salt, the delightfully aromatic and delicious salt that is perfect sprinkled on all foods, from fried eggs to vegetable fritters and fresh, hot steamed asparagus.  Truffle Salt is incredibly Unique.


The first time I tried truffle salt was years ago when I purchased it directly from a Truffle Grower in Australia.
I was instantly smitten by the amazing taste sensation.
Since then a bottle is always in my pantry.


Here is a precious black truffle weighing 8.5 grams.


This is natural sea salt
        purchased 
from a health food store.


Place two 8.5 gram black truffles
into a small food processor or blender.
Pulse for one minute until they are roughly chopped.


Add 150g coarse natural sea salt
and whiz for 2 minutes.

You will see the black truffles chopped into
small pieces
and combining with the sea salt.


Now, you have created truffle salt.
A truly originally flavoured salt
that tastes like nothing else you have ever eaten.


Sprinkle it on french fries, or spaghetti aglio, oilo e peperoncino
or perhaps a fresh rare piece of beef eye fillet.

Enjoy, the phenomenal aroma and exhilarating taste of truffle salt.


Buon appetito, enjoy, Merryn.

Monday, 7 July 2014

Merryn's Menu: Simple Sour Dough Starter for Sour Dough Bread

Merryn's Menu: Simple Sour Dough Starter for Sour Dough Bread: One thing I have always enjoyed successfully is baking. As a teenager when I baked my first loaf it was wonderful, had risen well and was c...

Simple Sour Dough Starter for Sour Dough Bread

One thing I have always enjoyed successfully is baking.
As a teenager when I baked my first loaf it was wonderful, had risen well and was crusty.
When I cooked sour dough bread last week it didn't occur to me that it may not work.
So I am surprised to learn that it can be difficult to achieve a light loaf.

You can see the Sour Dough Starter fermentation.


Here is the Sour Dough Starter that my brother gave me a cup of to take home you can read the original recipe here.

Day 1:  In a glass container mix one dessertspoon of wholegrain flour with one dessertspoon of unsweetened pineapple juice.   Leave out of fridge on bench with lid ajar, so allowing air, but so that no bugs can crawl in.
Day 2:  Repeat Day 1, allow mixture to rest.
Day 3:  Add two dessertspoons of wholegrain flour and two dessertspoons pineapple juice and stir.
Day 4:  Repeat Day 3, allow mixture to rest.
Day 5:  Add four dessertspoons of wholegrain flour and four dessertspoons of pineapple juice.
Day 6:  Repeat Day 5, allow to rest for remainder of the day.
Day 7:  Your Sour Dough Starter is now created.  It will now begin to ferment but it is a young organism.
Day 8:  Store Sough Dough Starter in refrigerator, in a glass jar with the lid slightly open.

Day 10, 2, 14, 16, 18, 20 etc., every second day feed your Sour Dough Starter with 1 dessertspoon plain white flour and 1 dessertspoon bottled water (chlorine free - e.g. rainwater).

Day 22:  Give your sister a cupful and make yourself a loaf of Sour Dough Bread.

N.B.  If your kitchen is cold, you might have to wait an extra day after steps 2 and 4 before proceeding.

I believe the secret to baking light bread is to knead it as little as possible, until the mixture is just combined, then let the proving time for the dough do all of the work for you.


The resulting Sour Dough Loaf.

Buon appetitio, enjoy Merryn.

Wednesday, 2 July 2014

Home Made Sourdough Bread

I have my brother to thank for getting me into the sour dough craze.


When I last visited Brett he had made some delicious and light sour dough bread.
He offered me sourdough starter in a jar with instructions to feed it 
every second day with equal amounts of plain flour and bottled water.  
So I dutifully took it home, stored it in the refrigerator slightly ajar and attended to it 
every second day (almost). When there was enough product I asked Brett for his recipe.


Here is the dough ready to be baked at 180 celsius.
I know it's good for you, but I have only liked purchased sour dough loaves, when toasted ... until now.
This bread is light and delicious.

Brett's Sourdough Bread

2/3 cup sour dough starter culture
1 1/4 cup filtered water
1 dessertspoon natural sea salt
1 1/4 cups plain flour

In a large bowl place the sour dough starter culture with the water and salt.  Stir until mixed.
Add flour and mix together, using your hands to incorporate the flour.
Knead lightly just until all is combined.
Cover with glad wrap and let rise for at least 7 hours in a warm place.

Heat oven to 180 celsius.
Grease a loaf pan with butter.
Pour sour dough batter into pan.
Splash a little water on top and bake on lower shelf for 40 minutes turning once through cooking.

Bread is cooked when the mixture has left the sides of the pan and it sounds hollow when tapped on top.


Thanks Brett, for the sour dough starter and this great recipe.


Buon appetito, enjoy Merryn.

Tuesday, 1 July 2014

Merryn's Menu: July 2014 Garden Share Collective

Merryn's Menu: July 2014 Garden Share Collective: Welcome to another monthly viewing of all great gardens shared through   The Garden Share Collective  hosted by Lizzie at Strayed From The Table ...

July 2014 Garden Share Collective

Welcome to another monthly viewing of all great gardens shared through

  The Garden Share Collective hosted by Lizzie at Strayed From The Table.


I am so pleased at how well the new herb garden has evolved. 
 Marjoram sits next to oregano, thyme, lemon thyme, tarragon, sage, 
coriander, holy basil, chives, parsley and perennial coriander all growing happily together.


There are 6 custard apples on our custard apple tree that was planted 3 years ago, how exciting!


There is lavender planted around the garden, a delight for the honey bees.
Also beneficial for it's gorgeous aroma and delicate flavour to ice cream and biscuits.
My daughter informed me that everyone should have at least one lavender bush for the bees to enjoy. 


The first blush of colour on the red papaya, though we have enjoyed some grated into a green papaya salad.


I hadn't noticed the ripening locquats
until my husband asked if the yellow burst
were flowers, fruit or dead leaves.

The fruit is much larger this year
and will undoubtedly also be sweeter.


The brassicas are slowly growing.  Cauliflower and broccoli with a little spinach.
Notice the recycling of the old trampoline frame, upturned to provide a frame for shade cloth.


We had a hail storm here last weekend.
The lovely lettuce were slightly shredded
but I removed the outer leaves, 
giving these to the chickens
and they are still growing strongly.
Picking the outer leaves from a dozen plants 
daily are enough
to offer the family fresh salad.


The curly endive (escarole)
survived the hail storm.
Like lettuce, I pick what leaves 
are needed and rarely
pluck the whole plant 
from the ground.


 Our winter shallots are ready for picking, aromatic and delightful.


We are eagerly awaiting this bunch of bananas to ripen, it will be picked in one month.


The piece de resistance are the July tomatoes, 
remember we are in the mid north coast of New South Wales
and I am picking one nearly every day now.
So delicious.
The tomatoes are sharing their bed with celery, continental parsley and coriander.

The rampaging chickens now have an outdoor run.
They are still allowed to free range but there is now a good balance between
vegetables for human consumption and everything-else-that-chickens-eat.

~~~~~~~~~~~~~~~~~~~~~~~~~

This week I planted two rows of snow peas,
a small bed of Australian garlic,
an elderberry shrub, 
some more lavender cuttings 
and horseradish.

Who says winter gardening is boring!!?

Buon appetito, enjoy Merryn


Monday, 30 June 2014

Merryn's Menu: Apricot Danish with Custard - a simple version

Merryn's Menu: Apricot Danish with Custard - a simple version: I clearly remember the first rock concert that I ever saw, it was Robert Plant supported by Jimmi Page on lead guitar at the Sydney Entertai...

Apricot Danish with Custard - a simple version

I clearly remember the first rock concert that I ever saw, it was Robert Plant supported by Jimmy Page on lead guitar at the Sydney Entertainment Centre.

As a teenager freshly moved to the city the excitement was enormous and it was a huge event.
I was so excited I just wanted to get on the train into the city and not bother with dinner, so my friends and I stopped at a bakery on Bondi Road and bought various pastries to eat on the train.
I chose an apricot danish - my very first bites of this delight.  It didn't quite look like this one, and had a cream cheese filling but it was still the start of a love affair!

Needless to say Robert Plant was fantastic, performing largely Led Zeppelin songs and the crescendo of Stairway to Heaven was phenomenal.   The adrenalin of the performers and the audience was electric.


There are some things in life you just look at and decide you can do too. I was determined to make danish. I have been making apricot danishes periodically since then and Led Zeppelin are still great listening.

This is my super quick adapted recipe, perfect for everyone.

# Take 4 sheets of ready made puff pastry out of the freezer and place on their plastic sheets, on your bench.
Turn on an old Led Zeppelin album, to create the mood.
# Make 2 cups custard, you can create an egg custard or even a packet mix will do for this recipe.  Let cool.
# Open a 800gram can of apricot halves and drain in a colander.
# Beat one egg yolk with one tablespoon milk for egg wash.
# 2 tablespoons apricot jam warmed, for glazing after cooked.
#  Lightly butter two baking trays.
#  Heat oven to 200 Celsius.


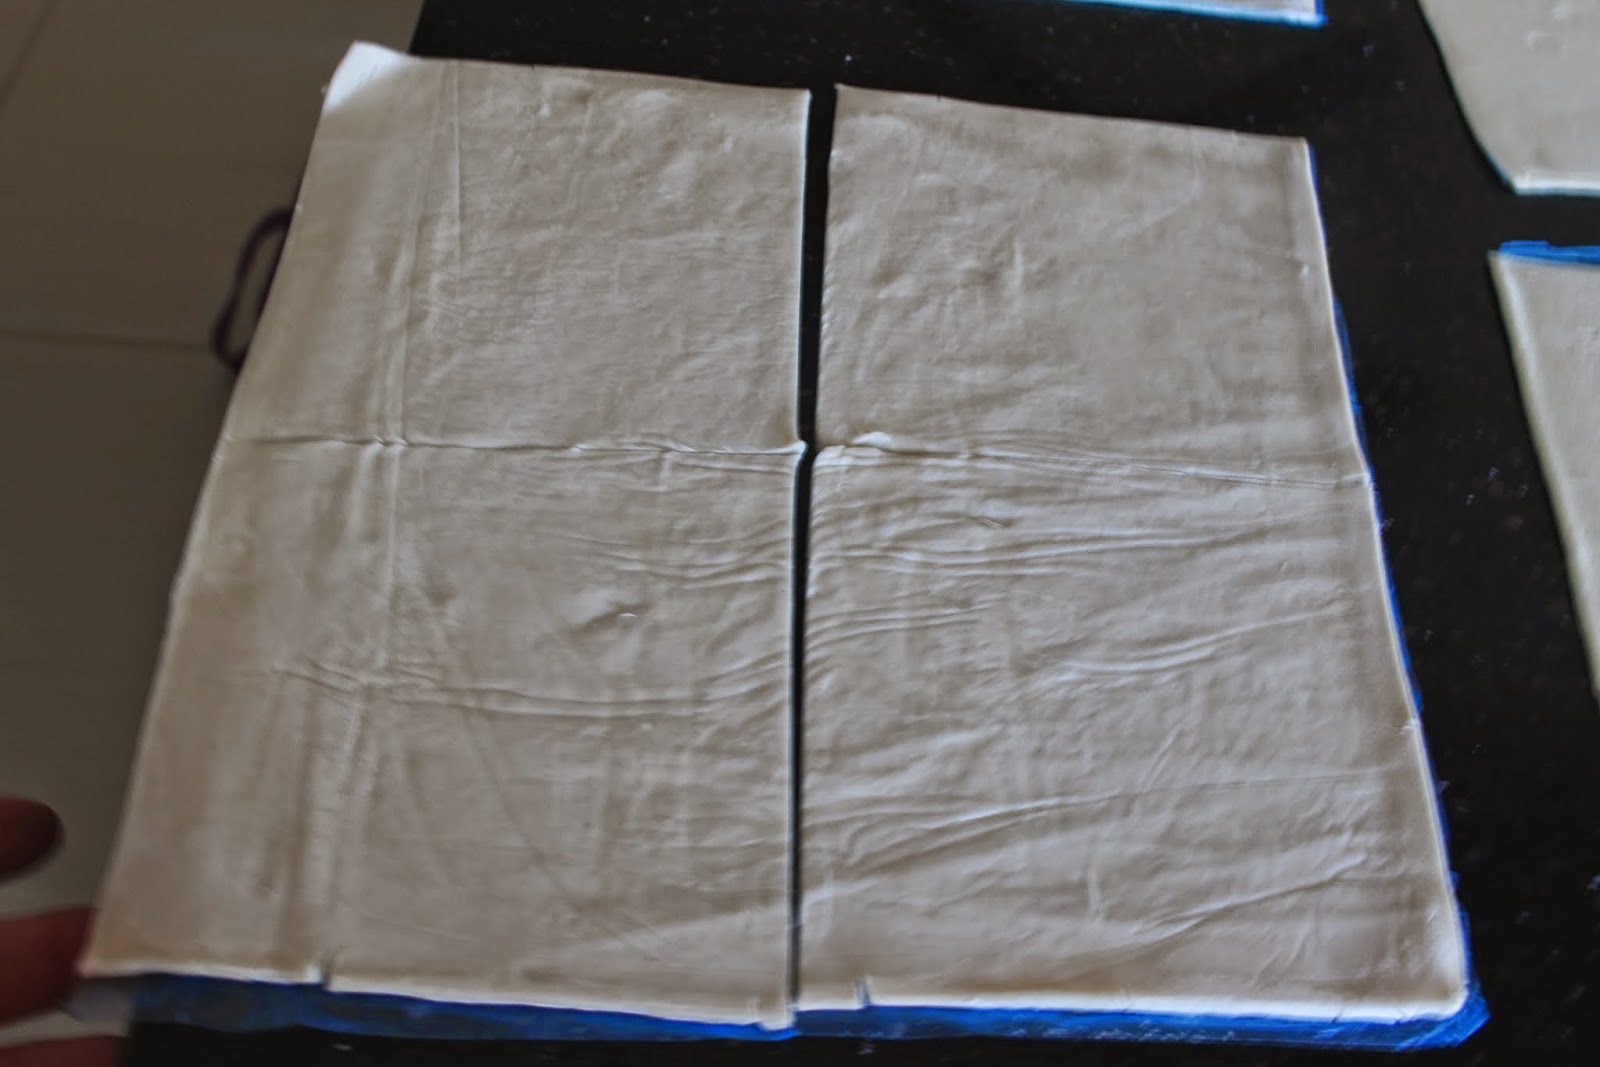
Cut the sheets of puff pastry, when defrosted, into four quarters.
Place a big tablespoon of custard into 2 corners of the pastry, as shown.


Place an upturned apricot half on top of the custard.


Fold over one side and lightly press to keep it's shape, as shown below.


Then turn the other side over on top of your first layer, lightly pressing to seal.
Carefully remove from plastic and place onto buttered baking tray.


Brush the egg wash on top of the apricot danishes.
Sprinkle the middle of each one with a little white sugar.


Bake at 200 celsius for approx 30 minutes, turning heat down to 190 celsius if browning too quickly.
Rotate your trays every 10 minutes.


Remove from oven, place onto cooling rack and brush the middle lightly with apricot jam.

Buon appetito, enjoy Merryn.

If you enjoyed this post, please leave me a comment, I love reading them and will always respond.


Wednesday, 25 June 2014

Merryn's Menu: Saint Fanourios Cake

Merryn's Menu: Saint Fanourios Cake: On Guard!  This praying mantis (also known as stick insect) is scarily adorable. Imagine the patience it would take to hold this...

Saint Fanourios Cake


On Guard! 

This praying mantis (also known as stick insect) is scarily adorable.


Imagine the patience it would take to hold this pose for hours.
He was only 2.5cm long and so beautiful.


My husband brought back recently a cake from a lovely bakery in Bulahdelah, ripe with walnuts and spices and I was reminded of this recipe given to me by an old Greek friend.  Not that I have lost anything yet but this cake is a Greek tradition as Saint Fanourios is the finder of lost objects and his Saints day is on August 27.  He can also apparently reveal the destiny of unmarried girls.  To petition the saint this ceremonial cake known as fanouropita must be presented as well as a votive offering and a silver effigy of the lost object.


I have actually lost my husband who is away for a week but I don't think cooking this gorgeous cake will bring him back any earlier than planned.  In fact I find every night these last four nights when the children are in their rooms and I am alone that I am keeping very busy, cooking and creating lotions with the television on in the background or talking with friends on the phone and staying up much later than normal.
What a  productive week it has been, the time is passing by quickly and hubby will be home very soon.
It may be that the magic of the fanouropita is working to bring him back quicker than expected.


I love reading about the Greek mythology, folk lore and saints, they have so much tradition.
When the tradition includes such heavenly delights as this one, it is even more enjoyable.


Saint Fanourios Cake

1 1/2 cups self raising flour
1 1/2 cups walnuts, coarsely chopped
1 teaspoon ground cinnamon
1 teaspoon ground cloves
1/2 cup freshly squeezed organic orange juice
4 tablespoons brandy
1/2 cup vegetable oil
4 free range eggs
1 1/2 cups castor sugar
Prepare a 20 x 30cm baking pan with melted butter and flour, or line with baking paper.
Preheat oven to 180 C (350 F).
In a large bowl combine flour, walnuts, cinnamon and cloves.
Blend the orange juice, brandy and oil together until well combined.
In another bowl beat the eggs and castor sugar together until fluffy.
Pour the liquid ingredients over the flour mixture and gently fold through until combined.
Pour into the prepared pan and bake for approx 45 minutes or until a skewer inserted comes out clean.
Remove from oven and let rest 10  minutes before turning out onto a wire rack to cool.
Dust with sifted icing sugar to serve.

Buon appetito, enjoy Merryn

I hope, that whatever you have lost, will now be found again.

Wednesday, 18 June 2014

Merryn's Menu: Ginger Pork - Shogayaki

Merryn's Menu: Ginger Pork - Shogayaki: Ginger Pork - Shogayaki Today I experienced an incredibly busy day.  Work was busy, with many customers filing in through the doors.  ...  I needed a quick dinner to create, shogayaki was the answer!

Merryn's Menu: Ginger Pork - Shogayaki

Merryn's Menu: Ginger Pork - Shogayaki: Ginger Pork - Shogayaki Today I experienced an incredibly busy day.  Work was busy, with many customers filing in through the doors.  ...  I eneeded a quick dinner to create, shogayaki was the answer!

Ginger Pork - Shogayaki

Ginger Pork - Shogayaki


Today I experienced an incredibly busy day.  Work was busy, with many customers filing in through the doors.  An old and dear friend phoned me unexpectedly (but welcomingly). My mother popped in for coffee and then a late customer came who kept me after hours.


I finally arrived home, after stopping for a quick trip to the supermarket where I decided to cook an old Japanese dish, Shogayaki, which literally means grilled ginger pork.

I placed the pork fillet on the bench and started getting out the flavourings when I realised I had to return to the office to retrieve a phone number to give to my husband (for work).
So, in good humour, and now slippers, I drove back to the shop, looked for  the information needed and returned home.  By now it was 6:45pm and I needed to get home - quickly!
(By the way I didn't find the correct phone number needed at all.  I searched through day books, invoice books and contact lists but the number needed was nowhere to be found.  Isn't that the case when you desperately need something?)

Anyway ... I chopped vegetables for stir frying and placed fresh noodles to soften in a warm water bath.  Then I thinly sliced the pork fillet and put together the pork seasoning flavours and heated up the pans.


Shoga means ginger and yaki refers to frying or grilling in Japanese.
Make sure to season the pork on both sides with salt and pepper.
You can use chicken or beef but pork is the traditional choice for Shogayaki


Shogayaki (Ginger Pork) Recipe

  • ½ 700g thinly-sliced pork loin
  • ¼ onion
  • 2 cloves garlic
  • 1 inch ginger (about 1 tsp finely chopped)
  • Salt
  • Freshly ground black pepper
  • 2 Tbsp. oil
  • 2 spring onions, finely chopped
Seasonings
  • 2 Tbsp soy sauce
  • 2 Tbsp mirin
  • 2 Tbsp sake
  • 1 tsp. sugar

Mix together the onion, minced garlic, finely grated ginger with spring onions, then combine with soy sauce, mirin, sake and sugar.
Thinly slice the pork fillet, season pork on both sides with salt and ground black pepper.
Heat up large pan to medium high, add 2 tablespoons oil and place pork slices in pan, cook for 1 minute, then turn over and cook 1 more minute.  Pour over combined seasonings, then take off heat and serve.
This is very quick to cook and serve, do not cook for too long as it can become tough.

I served this with stir fried vegetables and hokkien noodles dressed with a terayaki sauce.


By the way I didn't find the correct phone number needed at all.  I searched through day books, invoice books and contact lists but the number needed was nowhere to be found.  Isn't that the case when you desperately need something?


Buon appetitio, enjoy Merryn

Tell me, what is your favourite go - to dish when you are in a hurry to cook?

Thursday, 12 June 2014

Merryn's Menu: Slow Cooked Turkey and Bean Soup - my unique creat...

Merryn's Menu: Slow Cooked Turkey and Bean Soup - my unique creat...: Slow Cooked Turkey and Bean Soup On Sunday I purchased some gorgeous pork spare ribs.  Hubby commented how he adores the pork spare rib...

Merryn's Menu: Chilli Blue Swimmer Crabs cooked with Mussels

Merryn's Menu: Chilli Blue Swimmer Crabs cooked with Mussels: One of the advantages of living in a coastal town is buying lovely, fresh local seafood while it is seasonal. When we were children we wo...

Chilli Blue Swimmer Crabs cooked with Mussels


One of the advantages of living in a coastal town is
buying lovely, fresh local seafood while it is seasonal.


When we were children we would catch the haphazard crabs roaming the rocks and cook them in
cans that simmered over an open fire that were filled with salt water.  So simple and yet so delicious.
Little did we realise that we were starting a life long obsession, cooking fresh crabs with delightful flavours.

When we were children, crabs, fish, abalone and oysters were abundant and readily available. 


Now, as an adult, I still adore crabs and also spicy food.  

Chilli, garlic, turmeric and ginger are at the top of my list.

With the onset of June, we know the oysters, crabs and prawns are not as big or plentiful during winter. 
  When I saw these gorgeous local blue swimmer crabs, I couldn't resist having one last seasonal feast.  
These mussels (sourced from south of Sydney) were an added bonus and a welcome addition to our meal.


My recipe is adapted from the many chilli crab recipes available.

Chilli Blue Swimmer Crab with Mussels

8 fresh big blue swimmer crabs
1 kilo fresh black mussels
1/3 cup olive oil
10 garlic cloves, finely chopped
2 fresh long red cayenne chillies, chopped
3/4 cup tomato passata
1/3 cup white sugar
1/4 cup fish sauce
2 tablespoons malt vinegar
1/4 cup shaoxing wine
freshly ground black pepper
1/2 cup fresh coriander leaves, chopped, for garnish

To clean the crabs, lift off the top shell with a knife from the underside then pull off the top shell.  Cut crabs in half, then into quarters,  preferably with a cleaver, and discard the grey soft matter.  Rinse under cold water to clean the crab.  Roughly use the back of the knife to lightly push on and crack the claws.
In a large frying pan heat the olive oil and fry the garlic and chilli for about 1 minute over a medium heat.  Add the crab pieces and give everything a stir to incorporate flavours. 
Add the tomato passata, white sugar, fish sauce, shaoxing wine, malt vinegar and black pepper, stirring to incorporate the flavours.  
Cover with a lid, reduce heat to low and cook for about 8  minutes.  Remove lid and add cleaned and debearded mussles to mixture.  Put lid back on, give it a mild shake and cook for 3 more minutes.
Take off lid and add the chopped coriander leaves, tossing to combine.
Taste for seasoning, adding more pepper and salt to taste.
Serve on a big platter, accompanied by a big loaf of crusty bread and a fresh, clean garden salad.

Buon appetito, enjoy, Merryn.


Monday, 9 June 2014

Slow Cooked Turkey and Bean Soup - my unique creation

Slow Cooked Turkey and Bean Soup


On Sunday I purchased some gorgeous pork spare ribs.  Hubby commented how he adores the pork spare rib pieces one of our local restaurants serves as an entree and I said they would be deep fried.
So I simmered the plump ribs in a mild stock for 45 minutes until they were soft.
Draining them on paper towel my hubby decided he would take over, chopping them into large chunks and heating up 6cm of vegetable oil in the wok.  He delightedly placed about 10 in the wok  acting a bit like a master chef contestant.  
A minute later one of the pieces literally exploded, landing hot oil on his arm, 
then another, he was so lucky it didn't get in his eyes.  


Note that my pasta and bean salads where well and truly ready by this time.

Hot oil was flying through the air, drenching the bench, the floor and everything within a 2 metre radius.
'Put down a towel he said', as he clambered for a lid to try to take the brunt of the flying oil.  (Note too that I don't yet own a splatter screen.)   After another two rounds of the crispy deep fried pork and the oiling of my kitchen, he proudly served up his plate to the table like a maitre'd at a michelin star restaurant.
He mopped the floor before calling the family.   I had to shake my head and said ýou are never cooking that again in my kitchen'.   It took another two hot mops to totally eradicate the slippery vegetable oil.

We did however, laugh and laugh together, it was quite an amusing moment and a very funny evening.
We have all had a disaster in the kitchen and these epic moments become fond memories.


Needless to say that on Monday evening I opted for a safe, clean, easy dinner.
I spotted this pack of two huge turkey drumsticks and thought they would be great in a soup, slow cooked.
Note that if you don't have a slow cooker they would be also well cooked on low on your stovetop.


Slow Cooked Turkey and Bean Soup

2 turkey drumsticks
4 tablespoons olive oil
2 onions, finely chopped
3 cloves garlic, finely chopped
2 carrots, chopped
1 celery stick, finely chopped
2 bay leaves
1 cup dried canellini beans, rinsed
1/2 cup soup mix (dried lentils, beans and barley)
1.4 litres chicken stock (home made is best)
salt and pepper

Heat the oil in a large frying pan, rinse and pat dry the turkey drumsticks, season with salt and pepper then brown them all over.
Place into your slow cooker.  Fry the onion a few minutes, then add the garlic, carrots and celery. Cook for 3 - 5 minutes until slightly soft and they have absorbed any oil.
Put these on top of the turkey drumsticks with the bay leaves.
Heat up your chicken stock, mine was frozen so I placed the whole block in the pan to heat up.
Meanwhile add the canellini beans and soup mix to the pot and pour the stock over it all.

Cook on low for 7 - 8 hours or on high for 6 hours.
Remove the drumsticks carefully and shred the meat, discarding the bones and skin.
Return meat to soup and heat through.
Check seasoning and serve with a loaf of crusty bread.
Serves 8 people.


Buon appetito, Merryn.