Monday, 29 September 2014

Fried Ham Wraps

On Sunday I was hanging out wet clothes washing and taking off what was dry from the line.
My mother had arrived over for coffee and naturally helped me to do the washing.
"You should turn your good clothes inside out when hanging them on the line" Mother said.
"Mother" I replied "Washing the clothes is not an art form, it is something to do as quickly as possible".

I think lunch should be like this too, cooked as quickly as possible so you can enjoy your day.


N.B.  Most of our mothers did not work after they were married, and had ALL day to do chores.


                             Take one wrap and fill half of it with whatever fillings you enjoy.  
                                                Include cheese so the wrap melts together.


Super Quick Lunch Time Fried Wraps

2 white sandwich wraps per person (you could use burrito wraps)
sliced ham
mozzarella cheese, grated  (you could use tasty or cheddar)
tomatoes, finely sliced
pickled jalapenos, sliced
olive oil, to brush wraps

Lay one wrap on a tray, add 3 slices ham to cover one half of wrap.
Place sliced tomato on top, sprinkle with black pepper, then add the sliced jalapenos and sprinkle with cheese.  Fold over top, brush lightly with olive oil.
Heat griddle pan over medium heat, carefully place folded wrap on top and cook for 2 minutes.
Brush exposed side with olive oil then gently turn over with a spatula to brown underside for 2 minutes.  If desired, you can turn again at a 90 degree angle to create this cross hatch effect, fry for 1 minute then turn over at 90 degrees to create the crosses on the other side.
Place on a plate and cut into triangles.  Eat warm, or at room temperature.

Bon appetito, Enjoy, Merryn.

I ask you, seriously, do you turn your clothes inside out on the line so they don't fade?
Does anyone actually enjoy washing clothes?
I would rather be in the kitchen cooking, or walking in the garden.

Citronella Spray for Keeping Insects at Bay - My Unique Creation

The recent rain has meant mosquitoes have laid eggs and bred, well, more mosquitoes.
Flies that lay dormant for winter have resurfaced now that it is Spring.
My bees do not like commercial anti-insect sprays and have been attracted to - yet repulsed by these sprays so we do not like strong smells in our garden.  Nor do we like bee stings.


I will always use a natural alternative whenever possible,
such as this Citronella Anti Insect Spray. 


Distilled water is basically fresh rainwater that has been allowed to settle for a few days.
This Citronella Spray has a light, pleasant fragrance and is nice on your skin.

This product has been road tested in my backyard, directly in front of bee hive entrances.

Citronella Anti Insect Spray


250ml distilled water
2 teaspoons olive oil
130 drops Citronella Essential Oil

Diffuser bottle in which to store the spray.
Pour in measured water, add olive oil and count citronella drops.  Put on lid and shake to disperse.
Give it a light shake before using so that the oil is mixed through the water.

Enjoy, safely, Merryn.

Wednesday, 24 September 2014

Fijian Omelette - my unique creation

Whilst staying in Fiji every morning we would delightedly traipse down to breakfast by the ocean.
Breakfast was a delightful feast of fresh, tropical fruit, wicked pastries, hot fare or congee.

But it was the gorgeous "Egg Bar" where I inevitably strayed to on each sunny morning.

The warm and happy smiles of the Fijians were constant and a pleasure to see each day.  Bula!


When we arrived home, refreshed and relaxed 
I took up the tradition of frying these delightful omelettes each morning. 


Naturally, we called them "Fijian omelettes"


Dice your ingredients firstly, then heat up 2 tablespoons olive oil in a small pan.
Fry the vegetables/bacon for about two minutes then sprinkle with salt.


Pour over 2 eggs beaten with 2 tablespoons milk.

  
When the egg is almost set, sprinkle cheese on one side.


Then fold over so the cheese
melts in the middle.


Fijian Omelette for One

2 eggs, preferably free range, beaten with 2 tablespoons milk
2 rashers bacon, diced
1/4 capsicum, diced
1/4 onion, diced
1 small red chilli (optional) finely chopped
1 tomato, diced
2 mushrooms, finely sliced
1/3 cup grated cheese (cheddar or mozzarella)
2 tablespoons olive oil

Heat a small frying pan over medium - high heat.
Add the olive oil, swirling to cover bottom of pan.
Add the bacon, capsicum, mushrooms, tomato and chilli if using.  Cook for two minutes, stirring occasionally.  Sprinkle with a little salt, then pour over the beaten egg.
Turn heat to low and cook for about 4 minutes.
Place grated cheese over one half, then fold the other half on top to form a semi circle.
Cook for a further minute, then slide onto plate to serve.


Bon appetito.  Enjoy, Merryn.

Tuesday, 16 September 2014

Merryn's Menu: Preserved Lemons - so simple to make at home.

Merryn's Menu: Preserved Lemons - so simple to make at home.: I have a few cookbooks, many on different cuisines as you take a gastronomic trip around the world. Going through different cooking phases,...

Preserved Lemons - so simple to make at home.

I have a few cookbooks, many on different cuisines as you take a gastronomic trip around the world.
Going through different cooking phases, Preserved Lemons crop up in many Middle Eastern recipes.


How pretty is this on your pantry shelf!


The first time I was given a jar of preserved lemons, no one told me to discard the flesh.
They were really bitter.


These are funny looking specimens.


However, the preserved lemon rind is delicious.

Finely chopped and added to a mozzarella, tomato and olive salad with a lemony dressing,
or slow cooked in a delicious sauce with roasted lamb.


Preserved Lemons

Ideally use organic, unwaxed lemons.

8 lemons, washed and dried
1 1/2 cup fine sea salt
1 cinnamon stick
3 dried bay leaves
1 tablespoon black pepper corns
1 extra lemon, juiced
2 cups boiling water, approximately.

Large glass jar with a tight fitting lid, sterilised.

Cut lemons vertically into quarters but not the whole way through, just so that they open outwards.
Pack the lemons with salt and place into the bottom of the jar, pushing them together so they fit snugly and with no gaps.   Pour some salt on top of the bottom layer, add half of the spices, then lay the remaining lemons on top.  Cover with salt, add the remaining spices and cinnamon stick. 
Squeeze over the juice of one lemon and cover the lot with boiling water.  You do not want the lemon protruding above the liquid.
Seal, label, then place into a dark corner of the pantry for one month.

When using, remove the lemon, taking out how much you require and rinse in fresh water.
Discard the flesh and any pith then finely chop the rind to use in many recipes.

Bon appetito, enjoy Merryn

Sunday, 14 September 2014

Sourdough Loaf cooked in the Breadmaker - my unique creation.

Bring our your bread maker, dust it off and cook a perfect sour dough loaf in it, overnight.


The benefits of sourdough bread are myriad but essentially -


Sourdough bread is more digestible than normal white bread and more nutritious as well.
Lactic acids in the sourdough bread ensure the vitamins and minerals in the flour are
more available to your body by helping to neutralise the phytates in flour
that would inhibit their absorption.
 The sour dough bread is more digestible and less likely to cause food intolerance issues.
The acids also slow down the rate at which glucose is released into the blood stream
which lowers the bread's GI (glycaemic index).


There was not a recipe for sour dough loaf in any recipe book I have, 
so it seemed sensible to prepare it as normal, let it rise overnight in the tin, 
so the wild yeast could further ferment.
Then I baked as per any bread loaf after eight hours.


Sour Dough Breadmaker Loaf


Place 200g sourdough starter in a bowl
Add 300ml cold filtered water
400g plain flour (I use bakers flour)
1 teaspoon salt
1 teaspoon white sugar

Mix all together lightly in a bowl until just combined.
Place into the bread maker tin provided that is inserted in your bread maker.
Put into bread maker, click into place, choose setting (crusty)
and set timer so it is baked and finished for your 7am breakfast.

* Makes 750g loaf

This dough needs to rest for at least 8 hours before baking (up to 12 hours is okay).
Next time I will use the bread maker unit to initially mix the dough, then have a delayed start so it will still bake eight hours later.

The resulting loaf is light but with the unique sour dough texture you expect from sour dough.
We ate it fresh for two days and toasted on the third day.

Bon appetito, Enjoy Merryn


Tuesday, 9 September 2014

Merryn's Menu: Lemon Myrtle Biscuits - my unique creation

Merryn's Menu: Lemon Myrtle Biscuits (cucinato da zero): There is a lovely retired man who walks his terrier late every afternoon past my home. We have had many pleasant conversations and I know his dog's name is Tubby.

I asked my husband what the man's name was and MOH (my other half) replied "I can't remember if it is Bill or Ted as when he told me I remembered Bill and Ted for name association ".
I therefore assumed it had to be Bill.
Yesterday we were having a very long discussion on the footpath and I invited Bill to look at our tiled floor as he was considering re tiling his floors.  His wife, who ambled along later came to introduce herself, then MOH joined us as well. 

I bravely referred to Bill by name during this conversation, only to find his wife slapped him on the shoulder and said, loudly, Ted here ... 

See the little lemon myrtle specks in these cookies.


Outside of my kitchen window is a beautiful Lemon Myrtle Tree which has a gorgeous and strong fragrance.  The leaves are divine in both tea, cookies, yoghurt and cakes.  The flowers are delightful. 


(P.S.  Next time I see Ted I will explain why I called him Bill by accident.)

Lemon Myrtle Cookies

1 lemon, grated zest and juice
3/4 teaspoon dried lemon myrtle leaves
(I dry 2 leaves in the microwave for this then crumble them in the coffee grinder)
1 cup castor sugar
pinch of salt
120g unsalted butter, softened but not melted
1 1/2  tablespoons  olive oil
2 eggs
1 egg yolk
1 tablespoon vanilla extract
2 cups plain flour
1 cup fine semolina
1 teaspoon baking powder
1/4 teaspoon bicarb soda             

1/2 cup extra castor sugar for dipping

Whisk together in an electric mixer; the lemon zest, lemon myrtle, sugar and salt, beat for 1 minute to help the flavours permeate the sugar.  
Add the butter, olive oil and lemon juice then beat until white and fluffy.
Add the eggs one at a time, then the egg yolk, beating until well combined.  Scrape down the bowl with a spatula and whisk again until it looks shiny.  Add the vanilla extract and mix through.
Remove from mixer, add the flour, semolina, baking powder and bicarb of soda then mix with a wooden spoon lightly, until just combined.
Cover tightly with glad wrap and refrigerate for one hour.
Preheat oven to 170 Celsius (340 Fahreneit) and cover two trays with silicon or baking paper.
Roll pices of dough into balls roughly the size of walnuts, dip into the extra castor sugar and place slightly apart on the baking trays.
Bake in the preheated oven for 12 minutes until lightly golden.
Leave on trays for 2 minutes then remove to a wire rack to cool.

Lemon Myrtle Biscuits - my unique creation


There is a lovely retired man who walks his terrier late every afternoon past my home.
We have had many pleasant conversations and I know his dog's name is Tubby.
I asked my husband what the man's name was and MOH (my other half) replied "I can't remember if it is Bill or Ted as when he told me I remembered Bill and Ted for name association ".
I therefore assumed it had to be Bill.
Yesterday we were having a very long discussion on the footpath and I invited Bill to look at our tiled floor as he was considering re tiling his floors.  His wife, who ambled along later came to introduce herself, then MOH joined us as well.

I bravely referred to Bill by name during this conversation, only to find his wife slapped him on the shoulder and said, loudly, Ted here ...

See the little lemon myrtle specks in these cookies.


Outside of my kitchen window is a beautiful Lemon Myrtle Tree which has a gorgeous and strong fragrance.  The leaves are divine in both tea, cookies, yoghurt and cakes.  The flowers are delightful.

Soft, light mixture.
Roll the balls into walnut sized pieces.


Lightly golden, firm and slightly crispy.

(P.S.  Next time I see Ted I will explain why I called him Bill by accident.)

Lemon Myrtle Cookies

1 lemon, grated zest and juice
3/4 teaspoon dried lemon myrtle leaves
(I dry 2 leaves in the microwave for this then crumble them in the coffee grinder)
1 cup castor sugar
pinch of salt
120g unsalted butter, softened but not melted
1 1/2  tablespoons  olive oil
2 eggs
1 egg yolk
1 tablespoon vanilla extract
2 cups plain flour
1 cup fine semolina
1 teaspoon baking powder
1/4 teaspoon bicarb soda             

1/2 cup extra castor sugar for dipping

Whisk together in an electric mixer; the lemon zest, lemon myrtle, sugar and salt, beat for 1 minute to help the flavours permeate the sugar.  
Add the butter, olive oil and lemon juice then beat until white and fluffy.
Add the eggs one at a time, then the egg yolk, beating until well combined.  Scrape down the bowl with a spatula and whisk again until it looks shiny.  Add the vanilla extract and mix through.
Remove from mixer, add the flour, semolina, baking powder and bicarb of soda then mix with a wooden spoon lightly, until just combined.
Cover tightly with glad wrap and refrigerate for one hour.
Preheat oven to 170 Celsius (340 Fahreneit) and cover two trays with silicon or baking paper.
Roll pices of dough into balls roughly the size of walnuts, dip into the extra castor sugar and place slightly apart on the baking trays.
Bake in the preheated oven for 12 minutes until lightly golden.
Leave on trays for 2 minutes then remove to a wire rack to cool.

Bon appetito, enjoy Merryn

Sunday, 31 August 2014

Merryn's Menu: Last day of Winter Garden Share Collective

Merryn's Menu: Last day of Winter Garden Share Collective: This past week with the longer days, and plenty of rain, all crops are blooming. So too is the chickweed - shame we can't train the chi...

Last day of Winter Garden Share Collective

This past week with the longer days, and plenty of rain, all crops are blooming.
So too is the chickweed - shame we can't train the chickens to eat chickweed (what a funny name).


Here we have growing lettuce, broccoli and silverbeet in neat rows, growing taller than the weeds.


So many seedlings growing, from seed to become strong, ready to plant out into vegetable beds.


Snow peas and soy beans (edamame) growing with an upright support.


One big issue we faced is the amount of weeds
growing through the strawberry patch.
I forklifted up each strawberry plant,
removing the weeds and placed the strawberry
plants in foam boxes until their bed was totally
weeded, topped up with soil and ready to be replanted.


Charming silverbeet (spinach)

The aloe vera is very happy as it is flowering, a pretty orange sight. 


Produce we picked this week. two custard apples which will ripen now picked
a big bunch of bananas and the ever present luscious red tomato.

The nectarines are ripening early this year, probably because winter was so mild.

Broccoli side shoots
More lettuce


 I planted some pretty Heartsease in my herb garden to add colourful delight. 
These are so pretty, and also, edible.

I hope you have enjoyed my garden, as much as I enjoy gardening.
Please stroll around the other
members of the Garden Share Collective hosted by Liz
and be delighted by the spring gardens you can view.

Bon appetito, Enjoy Merryn


Monday, 25 August 2014

Merryn's Menu: Super Simple Strawberry Jam

Merryn's Menu: Super Simple Strawberry Jam: Last weekend I made a last minute emergency dash to pick up our apprentice from Newcastle. I knew it Publish Postwas possible that I would have to coll...

Super Simple Strawberry Jam

Last weekend I made a last minute emergency dash to pick up our apprentice from Newcastle.
I knew it was possible that I would have to collect him, despite having arrangements in place.
So in lieu of being invited to (a) a friend's tupperware party and (b) champagne later with my neighbour, I collected my Mother for company and headed off to Newcastle.
It would have been nice to have had more notice so we could have spent the day shopping in Newcastle;  but nevertheless at 3pm on arrival in Newcastle it was not worth the rush to spend one hour speed shopping at Charlestown or Greenhills.


Leaving Newcastle, with Sam in tow we noticed a wonderful road side stall near Morpeth sporting big, fresh, lovely strawberries.  We did some other fresh vegetable and fruit shopping too so we felt like the trip was worthwhile after all (no offence to Sam).


Strawberries have just come into season and they have been beautiful.

It was definitely time to make Strawberry Jam.

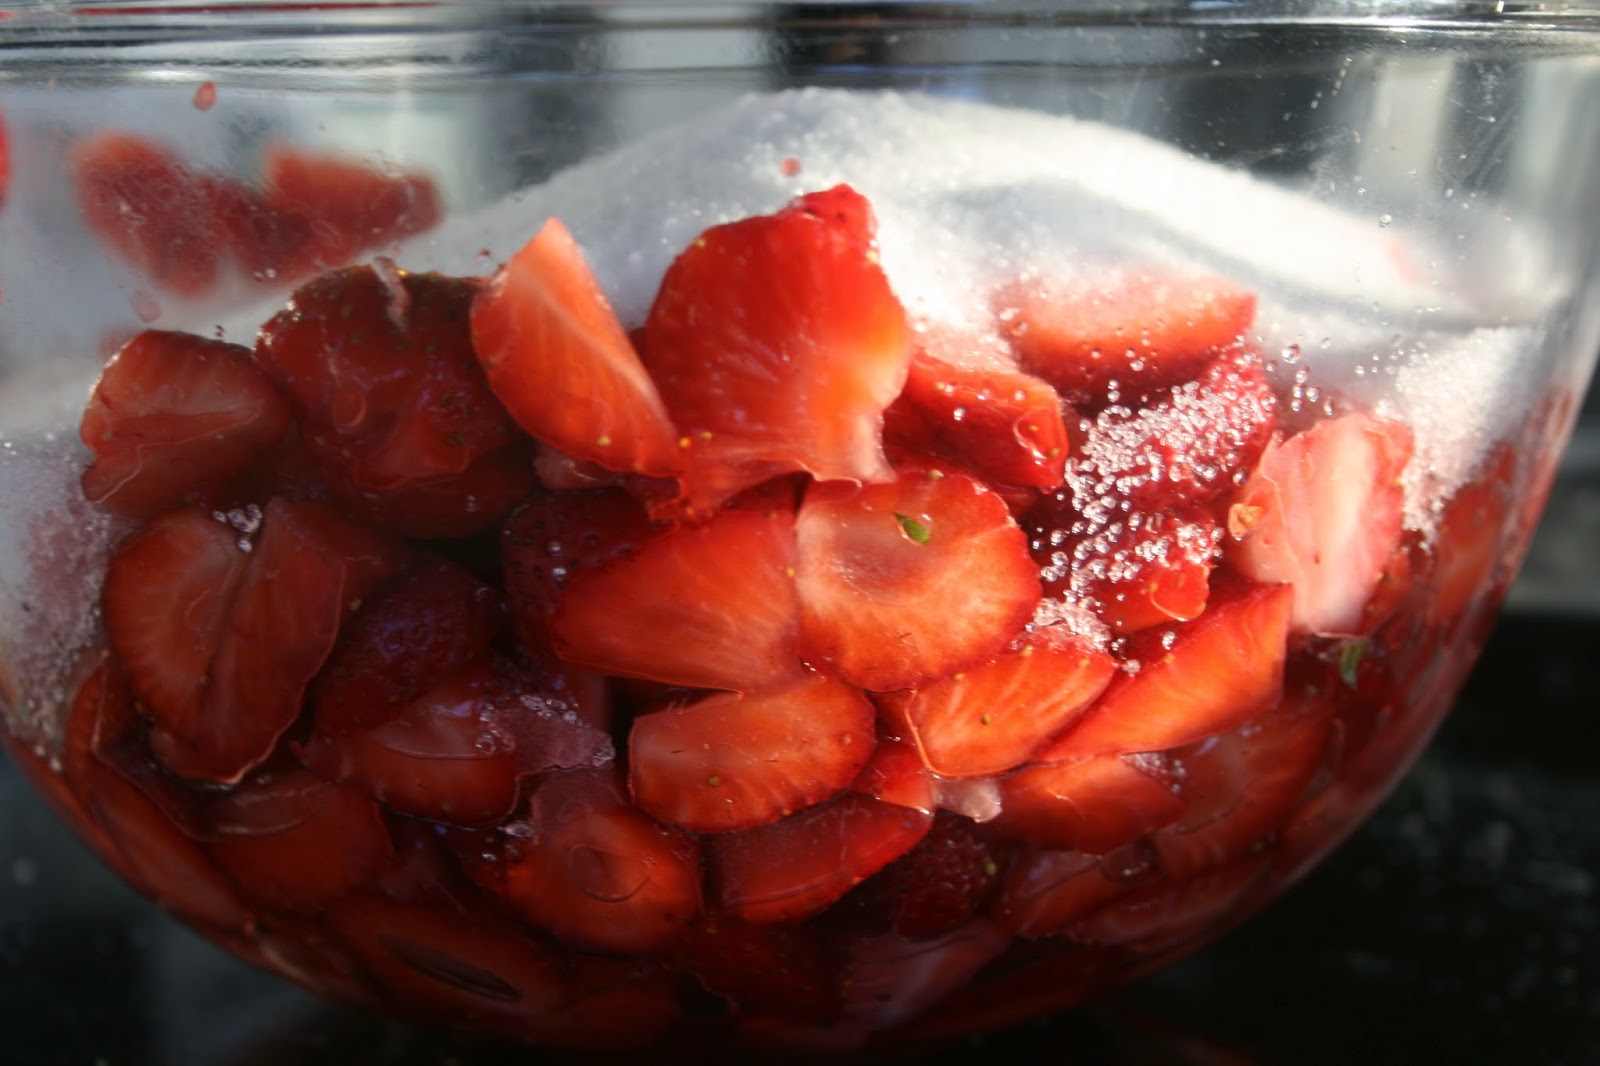
Firstly I weighed 1.3 kilos of strawberries, rinsed, hulled and roughly sliced them into a big bowl.
I weighed them again to find it had reduced to 1 kilo of lovely fresh strawberries.


Squeeze over the juice of two organic lemons, removing the seeds.
Let rest for 30 minutes.
Then weigh 1 kilo of white sugar and add to the strawberry/lemon mixture.


Pour into a big non reactive saucepan (I used a non stick pan)
and bring to a boil, stirring constantly until the sugar is dissolved.
Place on lid and let cook away, on a high simmer for about 30 minutes.


Pour into sterilised jars, seal while hot and label with name and date.
This Strawberry Jam will keep for 12 months.
You can store it in your pantry, but once open it must be stored in the fridge.
Make sure you give some jam to friends, to share the strawberry joy!

To test if your jam is cooked enough, place a ceramic saucer in the freezer.
After 30 minutes put a small spoonful onto the saucer, place back in freezer
then take out and push with your finger.  If little wrinkles occur then the jam is ready.
If not, cook for another 5 minutes and test again.


N.B.  Sterilise jars by placing clean glass ones into your oven and turn to 150C.
Then turn off and leave jars inside while the jam is cooking.
I place the lids in a bowl and pour over boiling water, leaving for 10 minutes.

Bon Appetitio, Enjoy, Merryn.

Monday, 4 August 2014

Merryn's Menu: August Garden Share Collective Garden Overview

Merryn's Menu: August Garden Share Collective Garden Overview: Here we are in the last month of winter and the garden is flourishing. I am so happy that there are several self seeded rocket patches ...

August Garden Share Collective Garden Overview

Here we are in the last month of winter and the garden is flourishing.

I am so happy that there are several self seeded rocket patches throughout the garden,
often growing in bare patches of dirt = a double bonus = win win.


New capsicum plants are now producing this winter's crop of sweet green capsicum.
I prefer to pick them green and crisp and rarely let them turn red.


This banana bunch seems to be taking forever to ripen
but it is slowly and surely beginning to turn yellow.
We hope to start eating this bunch during this month.


Radicchio, also self seeded and a welcome addition to our vegetables.
The chickens love radicchio too so we need to grow extra for them.


Endive (scarole) grows quickly, is hardy and delicious fresh in salads 
or lightly steamed or stir fried with cannelloni beans.


Celery, indispensable in minestrone and most soups.
Hardy and long lasting.


Home grown produce, the lowest hand of bananas cut to ripen indoors,
oranges from my parents (as our trees are only 3 years old) 
and chillies from various homes in our street as I am between flowers and green chillies.
It still shows what can easily be grown in a 1km radius from here.


These seedlings are broccoletti, radishes, various lettuces and bok choi. 
They have been in the ground for 1 month, the letttuce + bok choi will be ready to pick next week.


Shallots, rainbow chard, lettuce and more endive.
We are picking the shallots daily, as needed.


Broccoli, with small heads showing, cabbages and spinach, the cabbages
will be ready to pick in 2 - 3 weeks.


We have a huge diversity of vegetables growing at the moment, 
plus tomatoes, our winter tomatoes are very strong this year.


I specially hand selected seeds reknown for growing in cold climates and it was a good decision.
I love picking tomatoes all through Winter.

This is a round up of my garden this month.
Please have a look at the other Garden Share Collective members gardens here.

Buon appetito, enjoy, Merryn.