Showing posts with label sugar. Show all posts

Sunday, 14 September 2014

Sourdough Loaf cooked in the Breadmaker - my unique creation.

Bring our your bread maker, dust it off and cook a perfect sour dough loaf in it, overnight.


The benefits of sourdough bread are myriad but essentially -


Sourdough bread is more digestible than normal white bread and more nutritious as well.
Lactic acids in the sourdough bread ensure the vitamins and minerals in the flour are
more available to your body by helping to neutralise the phytates in flour
that would inhibit their absorption.
 The sour dough bread is more digestible and less likely to cause food intolerance issues.
The acids also slow down the rate at which glucose is released into the blood stream
which lowers the bread's GI (glycaemic index).


There was not a recipe for sour dough loaf in any recipe book I have, 
so it seemed sensible to prepare it as normal, let it rise overnight in the tin, 
so the wild yeast could further ferment.
Then I baked as per any bread loaf after eight hours.


Sour Dough Breadmaker Loaf


Place 200g sourdough starter in a bowl
Add 300ml cold filtered water
400g plain flour (I use bakers flour)
1 teaspoon salt
1 teaspoon white sugar

Mix all together lightly in a bowl until just combined.
Place into the bread maker tin provided that is inserted in your bread maker.
Put into bread maker, click into place, choose setting (crusty)
and set timer so it is baked and finished for your 7am breakfast.

* Makes 750g loaf

This dough needs to rest for at least 8 hours before baking (up to 12 hours is okay).
Next time I will use the bread maker unit to initially mix the dough, then have a delayed start so it will still bake eight hours later.

The resulting loaf is light but with the unique sour dough texture you expect from sour dough.
We ate it fresh for two days and toasted on the third day.

Bon appetito, Enjoy Merryn


Monday, 30 June 2014

Apricot Danish with Custard - a simple version

I clearly remember the first rock concert that I ever saw, it was Robert Plant supported by Jimmy Page on lead guitar at the Sydney Entertainment Centre.

As a teenager freshly moved to the city the excitement was enormous and it was a huge event.
I was so excited I just wanted to get on the train into the city and not bother with dinner, so my friends and I stopped at a bakery on Bondi Road and bought various pastries to eat on the train.
I chose an apricot danish - my very first bites of this delight.  It didn't quite look like this one, and had a cream cheese filling but it was still the start of a love affair!

Needless to say Robert Plant was fantastic, performing largely Led Zeppelin songs and the crescendo of Stairway to Heaven was phenomenal.   The adrenalin of the performers and the audience was electric.


There are some things in life you just look at and decide you can do too. I was determined to make danish. I have been making apricot danishes periodically since then and Led Zeppelin are still great listening.

This is my super quick adapted recipe, perfect for everyone.

# Take 4 sheets of ready made puff pastry out of the freezer and place on their plastic sheets, on your bench.
Turn on an old Led Zeppelin album, to create the mood.
# Make 2 cups custard, you can create an egg custard or even a packet mix will do for this recipe.  Let cool.
# Open a 800gram can of apricot halves and drain in a colander.
# Beat one egg yolk with one tablespoon milk for egg wash.
# 2 tablespoons apricot jam warmed, for glazing after cooked.
#  Lightly butter two baking trays.
#  Heat oven to 200 Celsius.


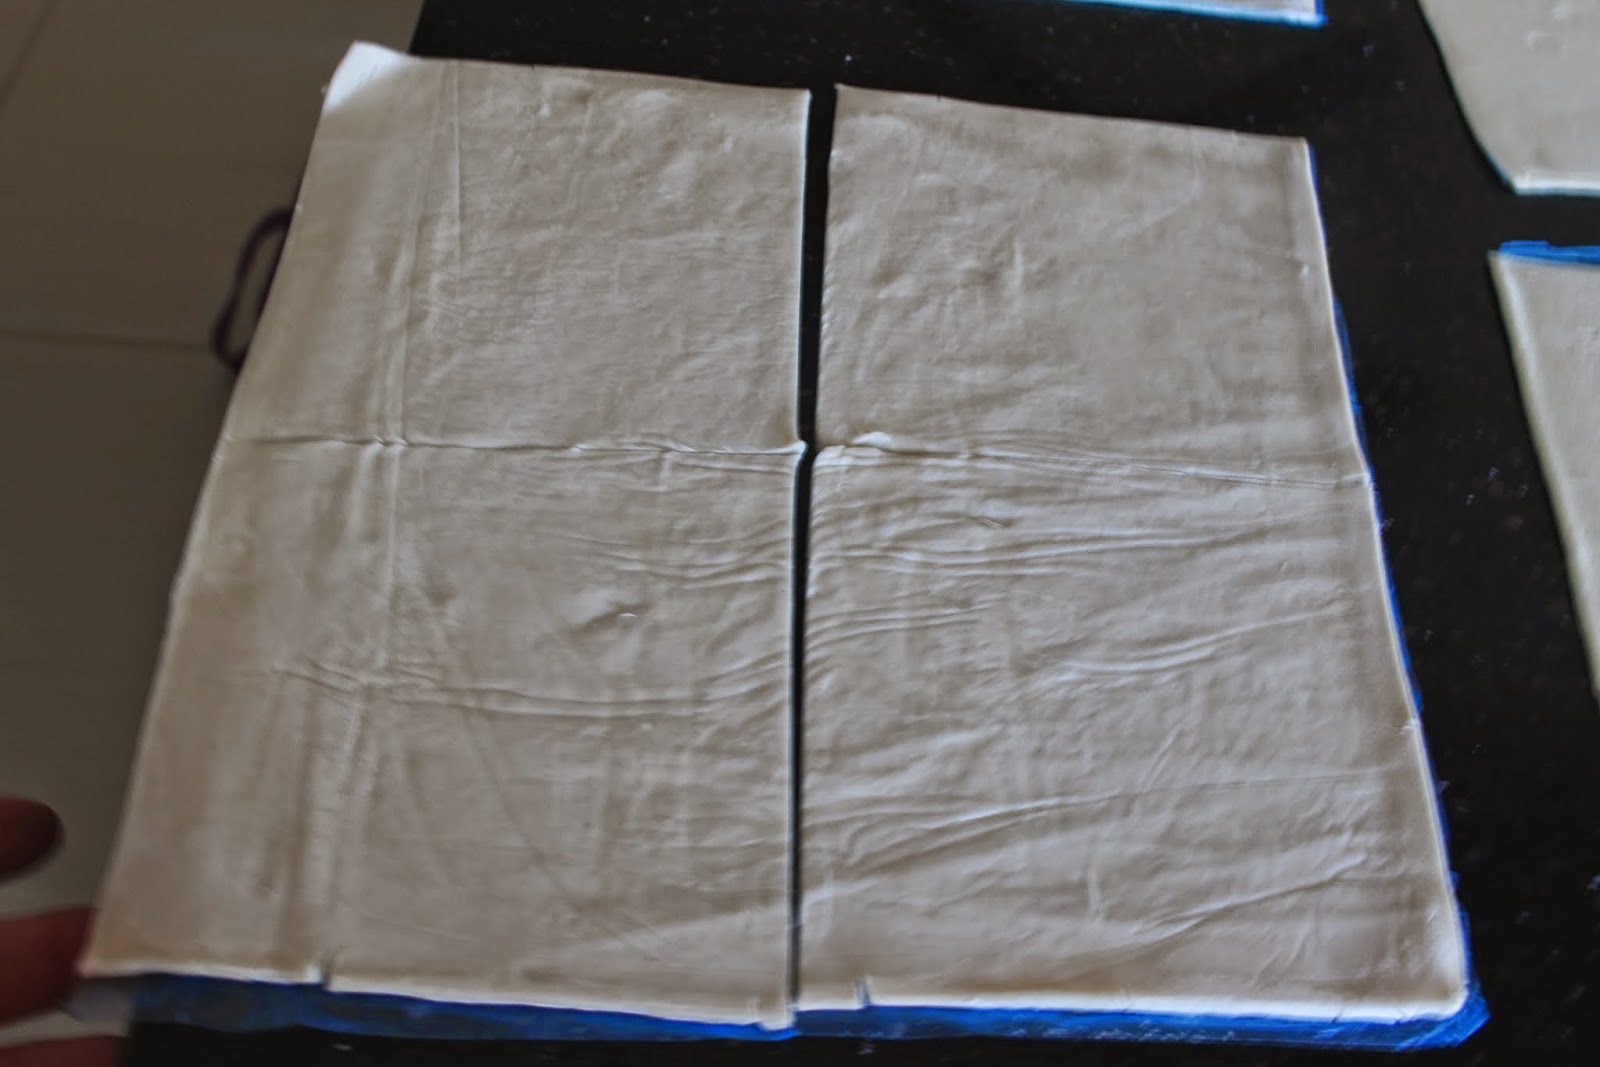
Cut the sheets of puff pastry, when defrosted, into four quarters.
Place a big tablespoon of custard into 2 corners of the pastry, as shown.


Place an upturned apricot half on top of the custard.


Fold over one side and lightly press to keep it's shape, as shown below.


Then turn the other side over on top of your first layer, lightly pressing to seal.
Carefully remove from plastic and place onto buttered baking tray.


Brush the egg wash on top of the apricot danishes.
Sprinkle the middle of each one with a little white sugar.


Bake at 200 celsius for approx 30 minutes, turning heat down to 190 celsius if browning too quickly.
Rotate your trays every 10 minutes.


Remove from oven, place onto cooling rack and brush the middle lightly with apricot jam.

Buon appetito, enjoy Merryn.

If you enjoyed this post, please leave me a comment, I love reading them and will always respond.


Sunday, 27 April 2014

Paris Brest

A delightfully stunning dessert


This is a simple yet elegant dessert.
Everyone likes pastries and filled with creme patisserie
this is  gorgeous.


There is so much fun in baking to keep one amused and the family, well fed.

Paris-Brest

Choux Pastry:

1 cup plain flour

pinch of salt

6 tablespoons (85 grams) unsalted butter

1/2 cup (125 ml) whole milk

1/2 cup (125 ml) water

4 large eggs, lightly beaten

For glazing:

1 egg, beaten

1/2 cup (50 grams) shaved almonds  (I used chopped almonds)

Preheat oven to 400 degrees F (200 degrees C) and place the rack in the center of the oven. Line a baking sheet with parchment paper. Draw an eight inch (20 cm) circle on the parchment paper to use as a guide when piping the choux pastry.  Pipe the pastry onto the unwritten side of paper and place on a baking tray.

In a bowl sift together the flour, sugar and salt. Set aside.

Place the butter, milk, and water in a heavy saucepan over medium heat and bring to a boil. Remove from heat and, with a wooden spoon, quickly stir in the flour mixture. Return to heat and stir constantly until the dough comes away from the sides of the pan and forms a thick smooth ball.  Let cool.
When the dough is lukewarm, start adding the eggs, one at a time, and beat with a spoon until it is incorporated.  Continue until all eggs have been added and the dough is smooth

Transfer the dough to a large piping bag fitted with a large plain nozzle.  Pipe a 2.5cm  thick ring of dough on the paper 20cm circle.  Pipe another thick ring inside the first ring, making sure the rings of dough are touching. Pipe another dough ring on top of both of the lines, continuing until all mixture is used.  Brush the top with beaten egg. Sprinkle with the shaved or chopped  almonds.

Bake for 15 minutes and then reduce the oven temperature to 350 degrees F (180 degrees C). Bake for a further 35 to 45 minutes or until the Paris Brest is a golden brown color, puffed, and crisp. Turn the oven off and, with the oven door slightly ajar, let the shell dry out for 5 minutes. Remove from oven place on a wire rack and split in half horizontally.  Let dry.


Creme Patisserie

2 cups milk
4 egg yolks
1/3 cup sugar
1/3 cup cornflour
1 whole vanilla bean.

Place the milk and vanilla bean in a saucepan and bring almost to boiling point.  Remove from heat.
Place sugar, cornflour and egg yolks in a bowl and whisk together until well combined.
Pour the hot milk in a steady stream into the egg mixture, stirring continuously.  Remove vanilla bean.
Pour this back into a clean saucepan through a sieve and bring to a simmer.
Continue to simmer for about 5 minutes until the mixture is thick.
Turn off heat and place glad wrap onto the surface to prevent a skin from forming.   Let cool.

To Assemble:  Spoon the creme patisserie onto the bottom half of the pastry.  Place the top half of the pastry shell on top and dust with powdered icing sugar.

Makes one large 8 inch (20 cm) Paris Brest.


So tell me please,
where would you suggest to holiday this year .... Thailand or Vietnam?

Buon appetito, Enjoy, Merryn


Monday, 17 March 2014

Fig and Ginger Jam

Home Made Fig and Ginger Jam

Figs are my most favourite Fruit


This year our fig trees have fruited prolifically.  There are so many figs and we have been picking them for more than three months.   I have eaten them, dried them, grilled them, jammed and cooked them, but I needed something new to do.  I considered a fig chutney, much like a mango chutney as an accompaniment to hot spicy curries.

I stumbled across this great post on kitchenlaw and had to give it a go.


My version of Ginger and Fig Jam (Chutney)

1.1kg fresh figs
750g white sugar
2.5cm piece of fresh ginger, finely chopped
zest and juice of 2 limes
1 teaspoon vanilla extract
1 teaspoon cinnamon

Cut off the stalks and wash the figs.  Chop them into 1cm cubes and place in a large non-reactive saucepan.
Turn the heat to medium and add the remaining ingredients.
Bring to a boil them simmer until thick approx 45 mins.
Test if done by placing a saucer in the freezer and put a teaspoon of jam on it to see if the jam has 'set'.
Ladle the jam into the sterilised jars, screwing their lids securely.

Sterilise your jars by placing them in a cool oven, turn to 150 celsius then let cool.
Place the lids in boiling water for 10 minutes.


I will be serving this as an accompaniment to hot curries 
which is why I didn't increase the amount of vanilla extract 
or cinnamon which give this jam a truly unique flavour.

Buon appetitio, enjoy Merryn

Wednesday, 15 January 2014

Ratafia

It is sublime to garden, cook and have a refreshing tipple all at once.

This is just what Ratafia offers ......

Grow the peach tree, pick the leaves, leave them soaking in white wine for 10 days, strain, bottle and enjoy!
Preferably on a garden seat, enjoying the view of flora.


(1)  Pick 125 peach leaves, wash them and leave to dry.
(2)  Take 1.5 litres white wine (I used Moscato which is a sweet wine).
(3)  1 cinnamon stick, 1 star anise and 3 whole cloves.
(4)  Place all into a large jar, seal and leave at room temperature away from the sun, for 10 days.


(5)  After 10 days strain, you will see how golden the white wine has become.
(6)  Now very gently heat 1 cup Vodka with 120grams of castor sugar, stirring to dissolve the sugar.
(7)  Let cool and add to the strained wine.
(8)  Bottle into sterilised jars, seal and enjoy.
(9)  Store 1 bottle in the refrigerator and keep the other 2 on your liquer shelf.

(I do wish I had removed the bottle labels first.)

Ratafia


You have Ratafia!   A gorgeous digestif; perfect to have in a small glass over ice to finish your meal.
You can also mix 1/3 Ratafia with 2/3's sparkling water with ice for a refreshing drink.

Please note you must be over 18 in Australia to drink alcohol.
Merryns Menu suggests drinking in moderation.

Buon appetito!  Enjoy, Merryn

Monday, 27 May 2013

Macadamia and Honey Cookies

Macadamia and Honey Cookies


A bonus of keeping bees is their gorgeous by-product - HONEY.  
Fresh honey extracted straight from the hive is incomparable in flavour, aroma and texture.
Combine this with macadamia nuts and you have a winner.

My mother recently returned from a holiday in northern New South Wales, bringing freshly picked macadamia nuts from a macadamia nut farm.  These were delicious and quickly sealed to keep in the freshness.  Some had been tossed in different seasonings from Italian to Australian bush flavourings, but all I wanted was the plain variety.  Along with the last of the honey harvest for the season, I was tingling with anticipation and reached for the flour and sugar to combine away.
I like to prepare biscuits, slices or cakes on the weekend.  As long as the cookie jar is filled every Sunday with a different offering - which usually lasts for about 3 days - I, and therefore the family, am happy.

Cookie baking is to be done quickly, as opposed to a gallant dessert which one can labour over for hours.

Beat butter, honey and  sugar until creamed.


Macadamia Honey Cookies 

125 butter, softened
2 large tablespoons honey
1/4 cup white sugar
1 teaspoon bicarbonate of soda
1 1/4 cups plain flour
3/4 cup shredded coconut
1/4 cup macadamias, finely chopped
2 tablespoons raw sugar (for dipping) optional

Cream butter, honey and sugar in a bowl with electric mixer until well combined and smooth.
Stir in flour, sifted bicarbonate of soda, coconut and macadamia nuts.
Roll into small balls, flatten slightly and dip one side into the raw sugar if desired, 
before placing on a silicon or baking paper lined tray.  
Bake in moderate oven 180C for 10 minutes until lightly browned.
Cool on trays for a few minutes before placing on a wire rack to cool.    Yield 35 biscuits.


Freshly baked biscuits.


Enjoy with a cappuccino, a cup of steaming black tea or a glass of milk.
Perfect for our Autumn weather when on some days, all you want to do is bake and cook.
Buon appetito, cheers Merryn

Thursday, 23 May 2013

Chocolate Snow Cookies

Chocolate Snow Cookies


These a feast for your eyes, delectable, attractive and delicious.
We were having tradesmen doing work on our house, from external painting through to woodwork.
The men were such cheerful souls, bustling in at 7.30am and working hard until they stopped for a cup of coffee and snack around 10.30am.  There were continual comings and goings through the house from the front to the rear.  These men were so happy, they obviously loved what they did and whistled while they worked.  I was so grateful the least I could do was to make them coffee and bake them a batch of cookies.


This is how this all-in-one super quick food processor recipe came about.
You do not have to sift anything either as the food processor will do all the work for you.

Chocolate Snow Cookies
1 1/2  cups self raising flour
1 cup white sugar
1/2 cup cocoa powder
1 teaspoon salt
75 grams butter
1/2 teaspoon vanilla extract
2 eggs

Extra:  1 cup icing sugar for coating dough balls, sifting is optional.


Put all dry ingredients into your food processor.  Lightly mix then add cubed butter and mix until it resembles fine breadcrumbs.
Add 2 eggs, 1 at a time, add vanilla extract and mix until it comes together as a ball.
Remove and roll into small balls, then coat in icing sugar generously.  

Place on paper or silicon lined baking trays and bake at 180 C for approx 10 minutes.   
Yields about 35 cookies.


Roll dough balls in icing sugar before placing  on tray.


When cooked they literally crack and the icing sugar creates a beautiful snow like effect on the chocolate cookies.


The wonderful tradesmen were very appreciative of my efforts and tried extra hard to give us a good result for the house with minimal charge.  I think you get always back what you give :D


Please, if you have enjoyed my post, let me know.
Buon appetitio Merryn :D

Tuesday, 30 April 2013

Preserved Chilli Peppers in Brine

Chilli Peppers in Brine

Peter Piper picked a peck of pickled peppers
A peck of pickled peppers Peter Piper picked.
If Peter Piper picked a peck of pickled peppers,
How many pickled peppers did Peter Piper pick?


I just love this nursery rhyme from childhood.  The beautiful alliteration is quite catchy and repeating the rhyme is enough to make you smile, a big happy smile :D

Funnily enough my parents ate quite bland food.  Fish or meat with 3 vegetables almost every night.
Both of my parents are steeped in English background.  My mother is a descendent of Matthew Everingham who was on the First Fleet, so I often joked to my friends that we were brought up on bread and water.

Actually, it was more like Sunday roasts with baked vegetables or freshly caught fish with oven baked chips and salad.  I vividly remember the first time I had garlic bread at a friends' house and marvelled at the amazing flavour.  Chilli, not very hot, was enjoyed at the same friends Italian family restaurant and had such an impact on me.

I was mesmerised!  These wonderful flavours had been hiding from me for all of my life.
Since then, my husband says that I am still making up for the lack of heat in my early years.  I love chilli.
I love garlic and chilli, together or apart.  If I have a sore throat the first thing I reach for is a spoonful of harissa or sriracha  to numb my throat and kill the germs (it certainly makes me feel better anyway).

Hence, we grow chillies, of many shapes, sizes and heat strength.
To eat, puree, cook, dry, freeze, give away, jam or to bottle.

This is an easy recipe for bottling whole chillies and I hope you too have the pure enjoyment of chilli peppers.


Leave the chillies whole, wash them and leave some stem on, about 1cm if possible.

Bring salted water to the boil and blanch the chillies in batches, for 1 minute, then remove, place in a colander and refresh with cold water.

Sterilise your jars by placing clean jars into a cold oven, turning the oven to 150 degrees celsius and when it has reached temperature., turn the oven off and let sit for 10 minutes.
Put the lids into a jug of boiling water and let sit 5 minutes, then carefully remove with tongs.

 Bring the vinegar to a simmer in a saucepan, adding the spices and stirring until the sugar is dissolved.


Take the sterilised jars from the oven with oven mitts, placing onto a tea towel on the bench so they don't crack on a cold surface.   Place the whole chilli peppers in the jar, then pour the brine solution over the top completely immersing the chillies in liquid.  You will find after 5 minutes that you need to add more brine as the air pockets in the chillies are filled with liquid.  Put the hot jar lids on and seal, label and let sit for 1 month before consuming.  This recipe will last for 2 years (if you don't eat them all first).

Pickled Chilli Peppers in Brine

600g fresh long chillies
2 tablespoons sugar
2 Tablespoons salt
1 Tablespoon black mustard seeds
10 black peppercorns
4 bay leaves
500ml cider vinegar
500ml white vinegar

Extra salt for boiling water


Rinse chillies, leaving them whole, then boil for 1 minute.  Remove and refresh in cold water.
Add all brine ingredients together and bring to a quick boil, stirring just until the sugar is dissolved.
Place chillies in hot sterilised jars, pour brine solution over until completely covered.
Seal and wait at least 1 month before consuming.
Buon appetito!


Homemade Crostoli

Making Crostoli - The Easy Way

Delicious Crostoli

I posted this previously on 'Bright Dinner Delights' but seeing as though Merryn's Menu is now my signature blog space, and Crostoli is such an important part of our life, I have transferred this updated recipe to here. 

Crostoli is a wonderfully light, fried Italian pastry.   Sprinkled generously with icing sugar - it really tastes as good as it looks. First introduced to Crostoli by my mother-in-law Mrs G who made it for special occasions, or to occupy a rainy day.  I have very fond memories of diantily nibbling on Crostoli whilst sipping an espresso, iced coffee or affogato with honeycomb with my extended family.

While it was often offered, and I was occasionally in residence when it was made I had never personally made this sweet treat.  When the good Mr and Mrs G first visited us in Sydney, after our second child was born I asked that now we had been married for twelve years, perhaps she would be kind enough to share her secret Crostoli recipe with me.  'Don't you have it?' she replied, almost sincerely,  'oh, but of course, here it is'.  I still have her treasured hand written recipe in my favourite Italian cook book.

View 1. Crostoli dusted with icing sugar
It is the wonderful family gatherings that make great memories and Crostoli is a big part of my in-laws food traditions.  Easter, Christmas, weekends, rainy days, birthdays or family gatherings always called for Crostoli.  It is enjoyable to make and purely delicious to enjoy.

When we visited last year, our parting gift was a big bag of crostoli which was almost entirely devoured on the first day.  Certain foods we relate to specific people and good food is always a blessing.
Crostoli is not hard to make, but definitely easier with a pasta roller than with a rolling pin - my first attempt! Attach your pasta roller to the kitchen counter top.  I use a little wooden wedge between the bottom of the benchtop and the tightened screw arm to prevent any damage to the underside of the counter top. 
View 2. Pasta roller attached to the kitchen bench
View 3. Place the flours and sugar into a large mixing bowl
View 4. Add the eggs, vegetable oil and brandy.  Add the grated zest of one lemon.
View 5.  Mix together by hand, then knead until you have a firm dough ball
At this time, if you have washing to hang out or something you really have to do, it is okay to cover and place in the refrigerator.  Simply bring out for 20 minutes prior to rolling.

View 6.  Starting with the largest setting, roll dough balls, the size of golf balls through the pasta machine
View 7. Place the sheets of rolled dough onto a lightly floured surface. It is quicker to run the whole batch through on the largest setting, then reduce the machine thickness by two twists and run them all through again
View 8.  Keep adding plain flour as needed to keep the dough supple and not sticking to your work surface.  When all dough strips have been rolled through the thinnest setting, it is ready to cut into strips.

These can be covered with a tea towel if not all rolled out in quick succession.
   
 View 9.  I use a fluted roller for a nice edge and twist 1 1/2 cm strips into rounds, bows or simply, strips
View 10.  Heat some vegetable oil, enough to deep fry in a large pan, fryer or wok to about 120 degrees celsius.  When you drop a bread cube in it should start sizzling gently,  immediately.
Gently drop in about 10 crostoli, fry for 1 minute then turn over and fry the underside for 30 seconds more
 When still pale but a light golden colour, remove with tongs and drain on kitchen paper.  The Crostoli will harden upon cooling.  If you are called away, cover the dough with a tea towel to keep moist.  When you have fried all of them, place some on a plate and sprinkle with sifted icing sugar.  Brew the coffee and enjoy!
 Only put icing sugar on servings as Crostoli will stay fresh in an air tight container for up to 2 weeks.

Mrs G's Crostoli

3 cups plain flour
2 cups self raising flour
1 cup sugar
6 large free-range eggs
1 small shot glass vegetable oil (50 ml)
1 small shot glass brandy (50 ml)
grated zest of 1 lemon
Mix flours and sugar together.  Add eggs, oil, brandy and lemon zest.  Mix to a soft dough and knead for 2 - 5 mins until pliable.   Divide into golf ball sized balls and flour your work surface.
Attach pasta maker to bench and turn to the thickest setting.  Run each small dough ball through and place on bench whilst you work on the next one.  Turn the pasta roller to the next setting and run each strip through again.  Keep flouring your bench.
Adjust the pasta maker to the next thinnest size and continue to run each strip through.  Cut the dough strips in half if getting too long to handle.  When they have gone through the thinnest, or even the second thinnest setting they are ready to be cut into strips.  Twist into bows, or loose round shapes or simply leave straight.
Heat vegetable oil for deep frying up to about 120 degrees, when a cube of bread dropped into the oil sizzles immediately then the oil is ready.  
Drop into the oil gently, 12 strips, fry for 1 minute then turn over and fry the other side for about 30 seconds or until a pale golden brown colour.  Remove with tongs and drain on paper towels.  Store in air tight containers when cool and serve dusted with icing sugar.

* For a variation, drizzle with honey and sprinkle with cinnamon instead of the icing sugar.
   Buon appetito!